Rushing to the canvas without a preparatory sketch isn’t a shortcut; it’s a direct path to a failed painting, wasted materials, and creative dead ends.
- A sketch acts as a low-cost diagnostic tool to solve compositional and value problems before they become irreversible.
- It builds your mental library of form, ensuring your abstract concepts are built on a foundation of structural integrity.
- It provides a clear roadmap for complex techniques like impasto and large-scale work, saving significant time and money.
Recommendation: Integrate a disciplined, time-boxed sketching phase into your workflow as a non-negotiable step to de-risk your creative process and elevate the quality of your final pieces.
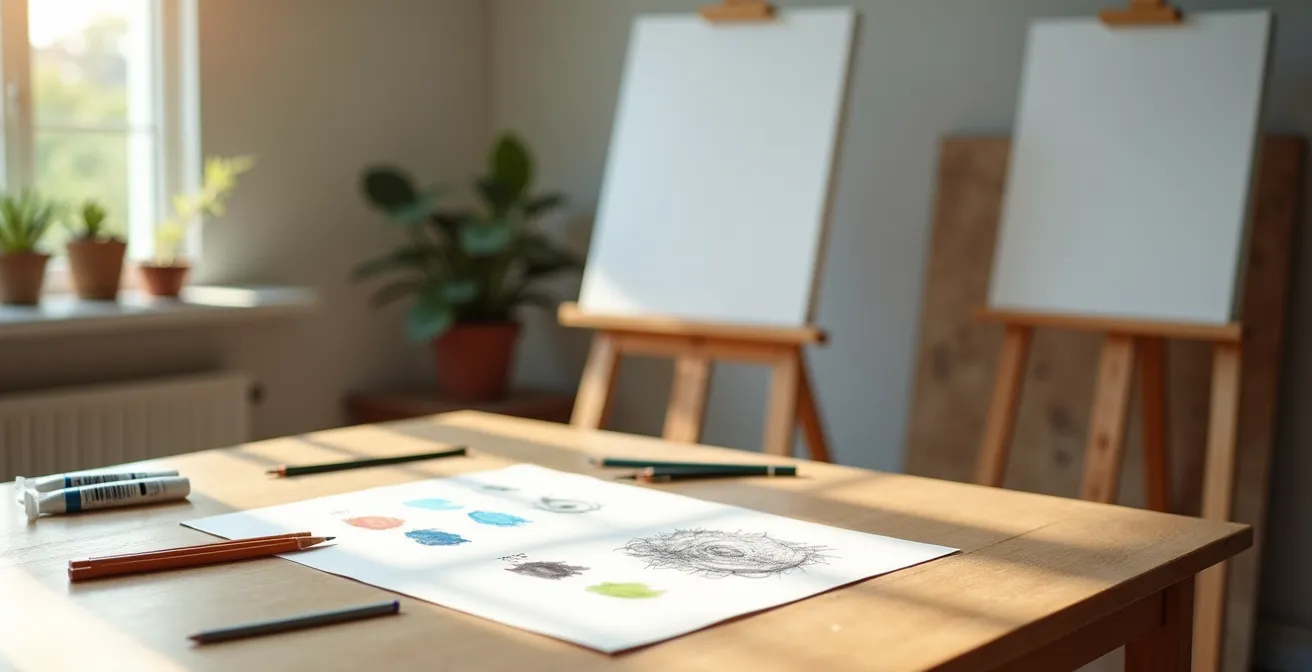
There is a uniquely frustrating moment every artist knows: hours into a new abstract piece, you realize something is fundamentally wrong. The composition feels weak, the values are muddy, and the initial spark of an idea has dissolved into a mess of expensive paint. You’ve hit the point of no return. You either try to salvage a failing work, wasting more time and materials, or you abandon the canvas altogether. The common advice is to simply “sketch more,” but this vague suggestion fails to address the core issue. It treats sketching as a polite preliminary rather than what it truly is: a rigorous, foundational discipline.
The problem for many artists who rush is a misunderstanding of the sketch’s function. It is not just about plotting out a design. For the abstract artist, in particular, the preparatory sketch is the critical stage of problem isolation. It is where you separate the core elements of your piece—line, shape, value, composition—and solve the structural challenges of each one before committing to the irreversible and costly medium of paint. This process isn’t about stifling spontaneity; it’s about building a solid architectural foundation upon which spontaneous, expressive marks can thrive without causing the entire structure to collapse.
But if the real key is not just to sketch, but to use the sketch as a strategic tool, how do you integrate this into your practice? The solution lies in treating the sketching phase with the same discipline as the final painting. This means understanding its economic value, mastering techniques for accuracy, and recognizing its role in building your long-term artistic skill. It’s a shift from seeing the sketch as a disposable first draft to embracing it as the most critical diagnostic and problem-solving phase of your entire creative process.
This article provides a foundational guide to reintegrating the preparatory sketch as a strategic tool. We will explore how this disciplined practice saves you from costly mistakes, ensures accuracy at any scale, and builds the deep visual understanding necessary for compelling abstract work. The following sections break down the specific, practical applications of this essential artistic discipline.
Summary: A Disciplined Approach to Preparatory Drawing in Abstract Art
- Why a 2-inch thumbnail sketch saves you $100 in wasted oil paint?
- How to transfer a small graphite study to a 6-foot canvas without losing accuracy?
- Drawing from life vs. Tracing photos: Which builds a better mental library of form?
- The proportion mistake in the sketch that becomes unfixable in the final sculpture
- How to time-box your sketching phase so you don’t procrastinate the real painting?
- Why infrared light sees through paint but stops at charcoal underdrawings?
- How to use heavy impasto without wasting $50 of paint per session?
- How to Choose the Right Oil Primer for Large-Scale Linen Canvases?
Why a 2-inch thumbnail sketch saves you $100 in wasted oil paint?
The most immediate and tangible benefit of disciplined sketching is economic. Every artist has experienced the sinking feeling of squeezing out expensive pigment, only to see it turn to mud on the canvas while trying to fix a flawed composition. A tiny, two-inch thumbnail sketch is the ultimate low-cost diagnostic tool to prevent this. It forces you to focus solely on the broad shapes and value structure of your composition without the distraction of color or detail. By iterating quickly through 10 or 20 of these tiny studies, you can solve 90% of your compositional problems using only a pencil and paper.
This process is not about creating a miniature masterpiece; it is about making decisions when the cost of changing your mind is virtually zero. Consider that professional-grade pigments can be a significant investment. According to professional art pricing data, some tubes of high-quality paint can cost over $100 per tube. Wasting this on a poorly planned canvas is a financial drain that a few minutes of sketching can entirely prevent. The thumbnail sketch allows you to fail quickly, cheaply, and privately, ensuring that when you do finally commit to the canvas, your resources are being used to execute a strong, pre-validated idea.
Think of it as risk management for your studio practice. By investing a small amount of time upfront, you de-risk the entire painting process. You confirm the balance, flow, and focal points of your abstract design before a single drop of expensive paint is touched. This small act of discipline transforms your workflow from a high-stakes gamble into a structured and confident execution, saving you hundreds of dollars in materials over the long term.
How to transfer a small graphite study to a 6-foot canvas without losing accuracy?
Once you have a strong composition locked down in a small sketch, the next challenge is scaling it up to a large canvas without losing the proportional accuracy and energy of the original drawing. A common pitfall is to attempt to “eyeball” the transfer, which almost inevitably introduces distortions that can unbalance the entire piece. The key is to use a systematic method that preserves the structural integrity of your initial design. This is not about mindless copying; it’s about using a framework to rebuild your drawing accurately at a larger scale.
Several methods exist, each with its own trade-offs between accuracy, cognitive engagement, and cleanup. A projector, for instance, offers high accuracy but can encourage a passive, “tracing” mindset that disconnects you from the act of drawing. In contrast, the traditional grid method forces you to re-engage with every line, analyzing and reconstructing your sketch square by square. This active process reinforces your understanding of the forms. A well-regarded variation is the Triangle Grid Method, described by artists as a favorite for its systematic and precise approach to scaling drawings.
The choice of transfer method has a significant impact on your final work. It dictates not only the accuracy of the underdrawing but also your mental engagement with the piece before you even begin to paint. The following table compares the most common techniques:
| Method | Accuracy | Cognitive Engagement | Clean-up Required |
|---|---|---|---|
| Grid Method | High | Forces re-engagement with drawing | Yes – grid lines |
| Projector | High | Encourages mindless tracing | No |
| AR Apps (Da Vinci Eye) | Variable | Moderate | No – virtual overlay |
Ultimately, selecting the right transfer technique is about finding the balance that works for your process. The goal is to ensure that the strong composition you developed in your small sketch is faithfully translated to the large canvas, providing a solid and accurate foundation for your painting.
Drawing from life vs. Tracing photos: Which builds a better mental library of form?
While sketching is a tool for planning a specific painting, its most profound benefit is cumulative: it builds your mental library of form. This is the internalized, intuitive understanding of how light, shadow, and structure work, which allows an artist to create convincing and compelling forms, even in abstract work. However, not all drawing practices are equal in this regard. The debate between drawing from life and relying on photographic references is central to this developmental process.
Drawing from life forces your brain to solve complex three-dimensional problems. You must interpret perspective, understand how form turns in space, and make active decisions about what to include or simplify. This struggle is precisely what builds the mental library. Tracing a photograph, by contrast, outsources this cognitive work. It flattens the world into a series of lines and shapes, training your hand to copy contours rather than training your mind to understand structure. While photos are an invaluable reference, an over-reliance on tracing can stunt the growth of this crucial internal resource.
This hierarchy of practice has historical roots. The Old Masters viewed drawing as the critical problem-solving phase, a stigma that unfortunately positioned it as ‘lesser’ than painting. As Artists Network points out in their discussion on the value of drawing:
A lot of the attitude about different mediums stems from the Old Masters. Back in the 15th century, drawings were often looked at as a preliminary study for future paintings. The drawings were where the artist sketched out the ideas, worked out the problems, and then moved on to paint.
– Artists Network, The Value of Paintings vs Drawings
Even for abstract artists, this foundation is vital. Creating abstract shapes from natural objects, like stones or plants, is a powerful exercise. This “Hybrid 3D Maquette Method,” where you draw from arrangements of real-world objects, bridges the gap. It allows you to study the complex interplay of light and form in a controlled environment, directly feeding your mental library with information that will enrich the texture, depth, and believability of your abstract creations.
The proportion mistake in the sketch that becomes unfixable in the final sculpture
In painting, a mistake in the underdrawing can sometimes be corrected. In sculpture, a proportional error made in the initial armature or maquette can be a fatal flaw—an irreversible commitment that compromises the entire piece. The cost is not just measured in wasted clay or bronze, but in weeks or months of labor. A small inaccuracy in the sketch, such as the length of a limb or the angle of a head, becomes magnified at full scale, resulting in a work that feels fundamentally “off” and is often impossible to fix without starting over completely.
The financial implications are significant. While data on sculpture is specific, the costs for large-scale artworks in general highlight the stakes; the average cost for canvas oil paintings can range from $100 to over $1,000 depending on size, and sculptural materials can easily exceed this. This is where a rigorous, multi-view sketching process becomes a non-negotiable part of the workflow. The solution is not to simply create one sketch, but to produce a series of orthographic views (front, side, top) that function as a technical blueprint. This forces you to check for consistency and ensure that the proportions are correct from every possible angle before you ever touch the final material.
This rotational sketching technique is a disciplined method for ensuring three-dimensional accuracy. By cross-referencing multiple 2D drawings, you build a complete 3D model in your mind and on paper. This methodical approach allows you to identify and correct any proportional inconsistencies at the earliest, lowest-cost stage. It is the ultimate form of problem isolation for the three-dimensional artist.
Action Plan: Rotational Sketching for Proportional Accuracy
- Create initial front view sketch with careful proportions.
- Develop orthographic side view, ensuring alignment with the front view at key landmarks.
- Draw a top-down view, checking for consistency with both previous views.
- Verify that all three views align at critical intersection points (e.g., shoulders, hips).
- Test the design’s balance and stability in these views before committing to final materials.
How to time-box your sketching phase so you don’t procrastinate the real painting?
For some artists, the sketching phase is rushed. For others, it becomes an endless cycle of “preparation” that masks a fear of committing to the final canvas—a form of procrastination known as analysis paralysis. The solution is to treat the sketching phase with structured discipline by time-boxing it. This means setting clear, finite time limits and specific goals for each stage of the preparatory work, transforming it from a vague, open-ended task into a series of focused, achievable steps.
Instead of an undefined “sketching” period, break it down. For example, allocate 30 minutes for thumbnail composition studies, one hour for a detailed value study, and another 30 minutes for color tests. Using a method like the Pomodoro Technique—working in focused 25-minute intervals—can be extremely effective. The goal of each session should be to solve one specific problem: “In this session, I will lock down the value map.” or “In this session, I will decide on the dominant and accent colors.”
A key to avoiding procrastination is defining clear “exit criteria” for the sketching phase. When are you truly done? A good set of criteria includes: a locked composition, a completed value map showing your light and dark structure, and a decided-upon color palette. Once these three conditions are met, the diagnostic phase is complete. It is time to move on to the execution. This structured approach, inspired by efficient learning systems like those of Stan Prokopenko, provides the framework to be thorough without getting stuck. It respects the preparatory work as a critical phase but prevents it from becoming a roadblock to the final creation.
This disciplined structure gives you permission to stop preparing and start painting. It builds momentum and confidence by turning the daunting task of starting a new piece into a manageable, step-by-step process. You are not just “getting around to it”; you are executing a well-defined plan.
Why infrared light sees through paint but stops at charcoal underdrawings?
The preparatory drawing is not just a guide; it is the literal, physical foundation of a painting, often hidden beneath layers of paint. Art conservation science provides a fascinating window into this hidden structure through a technique called infrared reflectography. This technology allows us to see through the upper paint layers of a masterpiece and reveal the original underdrawing, offering direct evidence of the artist’s initial thoughts and plans. It is a powerful illustration of the sketch’s role as the painting’s unseen architecture.
The science behind this is based on the properties of materials. Infrared light, particularly in the spectral range of 700-1700 nm used in modern systems, can penetrate the relatively transparent pigments in oil paint. However, when this light hits a line made of a carbon-based material like charcoal or graphite, it is absorbed. The carbon is opaque to infrared radiation. As a result, the underdrawing appears as a dark image on the infrared camera’s sensor, while the overlying paint remains largely invisible. This contrast allows art historians to study the artist’s original sketch with incredible clarity.
A famous example is the infrared examination of Botticelli’s “Virgin and Child.” After cleaning, the painting was re-examined with a high-tech InGaAs camera. As detailed in the Yale University Art Gallery’s conservation report, this revealed a highly complex and extensive underdrawing beneath the paint. It showed how Botticelli meticulously worked out his composition and figures, making changes and refining his ideas directly on the panel before applying color. This physical evidence proves that for even the greatest masters, the painting was the execution of a well-solved drawing. The sketch was not a suggestion; it was the blueprint.
How to use heavy impasto without wasting $50 of paint per session?
Heavy impasto—the thick, sculptural application of paint—is a powerful expressive technique. But it is also one of the most materially expensive. Applying thick layers of pure oil color can consume vast quantities of paint, and without proper planning, much of it can be wasted. Trying to build texture “on the fly” often leads to a muddy, overworked surface and a significant financial loss, with a single session easily costing over $50 in pigment alone, especially when using artist-grade paints.
The solution lies, once again, in the preparatory phase. A disciplined approach to impasto involves separating the act of building texture from the act of applying color. Instead of sculpting with expensive oil paint, you can build up the structural underpinnings with cheaper materials. This allows you to create the desired texture and form without anxiety about wasting costly pigments. Once this textural base is completely dry, you can apply thin, more economical glazes of your expensive oil colors over the top. The visual effect is that of thick, rich impasto, but the material cost is a fraction of what it would have been.
Several cost-effective techniques can be employed to achieve this:
- Build the foundational texture with an inexpensive acrylic modeling paste before applying any oil paint.
- Mix traditional gesso with materials like marble dust to create a durable, sculptural understructure.
- Apply your final, expensive oil colors with a palette knife instead of a brush, which allows for cleaner application and easier recovery of unused paint from the palette.
- Create a “texture map” as part of your initial sketching phase, planning exactly where the thickest and thinnest applications will be, just as you would plan your values.
This strategic separation of texture and color is another form of problem isolation. It allows you to solve the sculptural challenges of your surface independently of the chromatic challenges, ensuring a more successful and economically sustainable impasto practice.
Key Takeaways
- The preparatory sketch is a diagnostic tool for isolating and solving problems, not just a preliminary plan.
- Systematic processes like the grid method and rotational sketching are crucial for maintaining structural integrity from sketch to final piece.
- Building your “mental library” by drawing from life is a long-term investment that enriches even purely abstract work.
How to Choose the Right Oil Primer for Large-Scale Linen Canvases?
The final, and most literal, foundational decision an artist makes is the choice of primer. This is the layer that separates the canvas from the paint, and its properties have a profound impact on everything that comes after, including the durability of the underdrawing and the final appearance of the paint. For large-scale linen canvases, where stability and archival quality are paramount, this choice is especially critical. Choosing the wrong primer can lead to a surface that is too absorbent, causing the oil to sink and colors to dull, or too slick, preventing the paint from adhering properly.
The two main categories are traditional oil primers and modern acrylic “gesso.” Each offers a distinct surface quality and is suited for different techniques. A traditional oil primer creates a slick, non-absorbent surface that is ideal for subtractive underpainting techniques, where the artist wipes away paint to reveal the light of the ground. An acrylic gesso, on the other hand, has more “tooth” or texture, making it perfect for receiving a detailed charcoal or graphite underdrawing. The choice of primer is therefore a strategic one, directly linked to the type of preparatory work you intend to do.
The complexity of paint chemistry itself underscores the importance of this foundation. As explained by Jackson’s Art Blog, the formulation of oil paint is a delicate balance.
The complexity of production is increased because each pigment needs an exact ratio of oil, otherwise, it will absorb and then weep out oil later or be too dry and brittle to paint with if there is too little oil.
– Jackson’s Art Blog, Why is Oil Paint So Expensive?
This sensitivity means the primer must provide a stable, consistent surface to prevent issues like delamination or cracking over time.
| Primer Type | Surface Quality | Best For | Long-term Flexibility |
|---|---|---|---|
| Traditional Oil Primer | Slick, non-absorbent | Subtractive underpainting | Excellent |
| Acrylic Gesso | Tooth texture, absorbent | Detailed charcoal underdrawing | Good |
| Lead Primer | Very smooth | Archival quality | Superior |
| Titanium/Zinc | Moderate tooth | General purpose | Variable |
This final step closes the loop of preparation. By selecting a primer that supports your underdrawing technique, you ensure that the blueprint you so carefully developed has the best possible foundation upon which to be built.
By integrating these disciplined, foundational practices into your workflow, you transform the act of sketching from a perfunctory step into a powerful strategic advantage. Start today by dedicating structured time to this critical diagnostic phase for your next piece.