The longevity of an outdoor sculpture is not a matter of chance, but of applied material science.
- Material properties like tensile strength and porosity are more critical than simple weight or appearance in predicting durability.
- Invisible threats, such as galvanic corrosion between dissimilar metals, can destroy a piece from its base up if not properly managed.
Recommendation: Prioritize material compatibility and structural engineering during the design phase to prevent irreversible decay and ensure the artwork’s permanence.
For a collector or sculptor, there is no greater fear than watching a commissioned masterpiece degrade within a lifetime. Choosing a material for an outdoor work, especially in a harsh climate, is a decision weighed with the hope of permanence. We often lean on familiar names—marble’s classical beauty, bronze’s timeless gravitas. The common advice is to simply “pick something durable,” but this vague guidance ignores the powerful, invisible forces that determine whether a sculpture will last for thirty years or three thousand.
The true durability of a material is not in its name, but in its specific physical and chemical properties. A decision that seems purely aesthetic can have profound structural consequences. Why can one material support a delicate, outstretched form while another requires hidden internal armatures? How can two different metals, safe on their own, actively destroy each other when combined in a single installation? These are not questions of art, but of science.
This guide moves beyond surface-level aesthetics to empower you with the knowledge of a material scientist. We will dissect the crucial engineering principles that govern a sculpture’s lifespan. By understanding concepts like tensile strength, material porosity, and galvanic corrosion, you will learn to see materials not just for what they look like, but for how they behave under stress over decades and centuries. This is the key to commissioning or creating a work that truly endures.
The following article breaks down these complex scientific principles into a series of practical, answer-focused sections. From testing stone for hidden flaws to calculating a sculpture’s stability, you will gain the technical confidence to make choices that ensure your artistic legacy stands the test of time.
Before delving into the technical specifics, the following short visual piece offers a moment of context on the importance of considered choices in the digital and physical world. It serves as a brief interlude before we explore the tangible science of sculptural longevity.
To navigate the critical factors that ensure a sculpture’s permanence, this guide is structured to answer the most pressing questions a collector or artist faces. Each section addresses a specific challenge, providing clear, science-backed insights to inform your decisions.
Summary: A Sculptor’s Handbook for Material Permanence
- Why marble needs internal pinning for outstretched arms but bronze doesn’t?
- How to sound-test a block of marble to find hidden internal cracks?
- Cast Stone vs. Carved Stone: Which holds sharp detail better after 20 years outdoors?
- The installation mistake of mixing metals that eats away sculpture bases
- How to calculate the center of gravity for a mixed-media sculpture to prevent tipping?
- Chemical Biocide vs. Soft Brushing: Which keeps the stone healthy longer?
- Matte Glaze vs. Glossy: Which stands up better to dishwasher abrasion?
- How to Reduce Foundry Costs Without Sacrificing the Quality of the Cast?
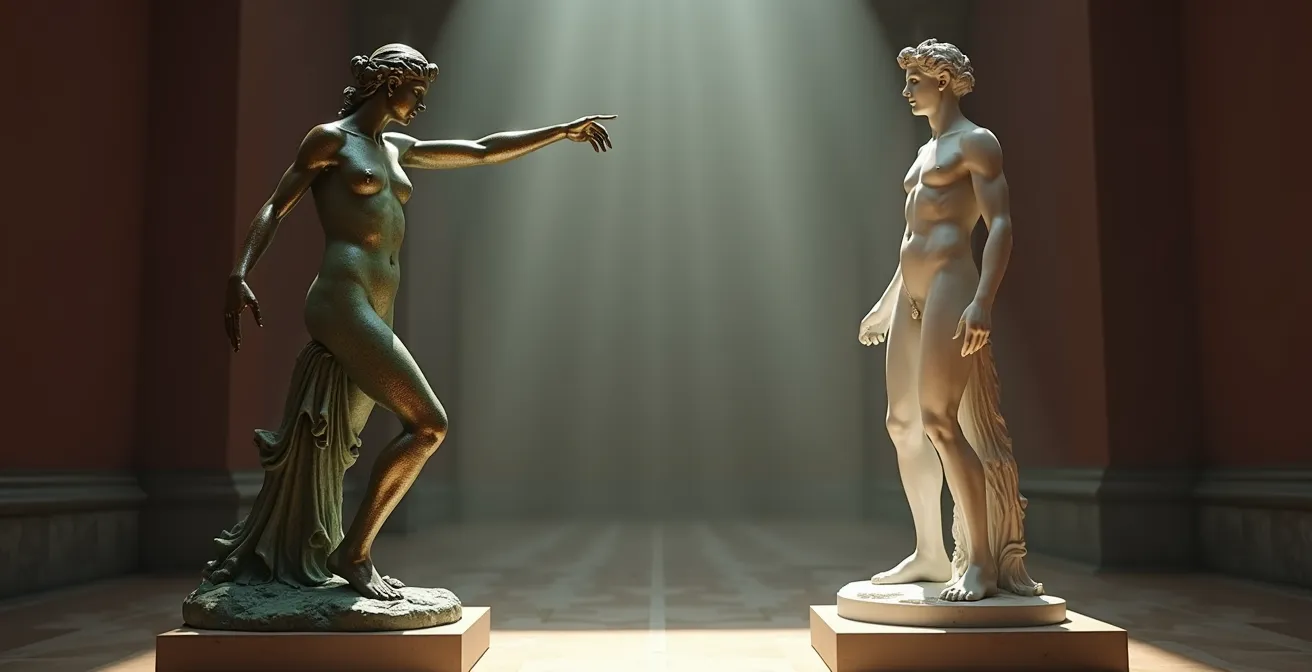
Why marble needs internal pinning for outstretched arms but bronze doesn’t?
The answer lies in two different types of strength: compressive and tensile. Stone like marble possesses immense compressive strength, meaning it can withstand enormous pressure from being pushed or squeezed. This is why it has been used for millennia as columns and building blocks. However, marble has very poor tensile strength—its ability to resist being pulled apart. An outstretched marble arm is fighting gravity, which creates tension in the upper part of the limb. Over time, this tension can cause microscopic fissures to grow, leading to catastrophic failure.
To counteract this weakness, sculptors must use internal pinning, inserting stainless steel or other strong rods to act as a skeleton that bears the tensile load. This is a complex and expensive process that introduces its own risks of internal corrosion if not done perfectly. Bronze, on the other hand, is an alloy engineered for both compressive and tensile performance. Its metallic crystalline structure allows it to resist both pushing and pulling forces effectively.
The difference is stark when you look at the numbers. An engineering analysis reveals that silicon bronze has a tensile strength of 345-630 MPa, while marble’s is a mere 9 MPa. This massive disparity means bronze can support its own weight in complex, cantilevered forms without any internal assistance. Different bronze alloys offer varying capabilities; for instance, aluminum bronze is stronger than tin bronze, allowing artists to select an alloy based on specific structural demands. This inherent tensile strength gives bronze a fundamental freedom of form that stone can only achieve with hidden engineering.
How to sound-test a block of marble to find hidden internal cracks?
A pristine block of marble can harbor invisible flaws—veins of weakness or internal fractures from its quarrying—that can compromise a finished sculpture years later. Before a single cut is made, experienced sculptors perform a “sound-test” or percussion test. This ancient, low-tech method uses sound waves to map the internal integrity of the stone. A solid, homogenous block will ring with a clear, high-pitched, and sustained tone when struck, much like a bell.
Conversely, a block with an internal crack, void, or impurity will produce a dull, flat “thud.” The fracture disrupts the travel of the sound waves, dampening the resonance immediately. This simple auditory feedback provides a non-destructive map of the stone’s hidden geology. To perform this test, one must be systematic, creating a grid across every face of the block and tapping each point to listen for variations in the tone.
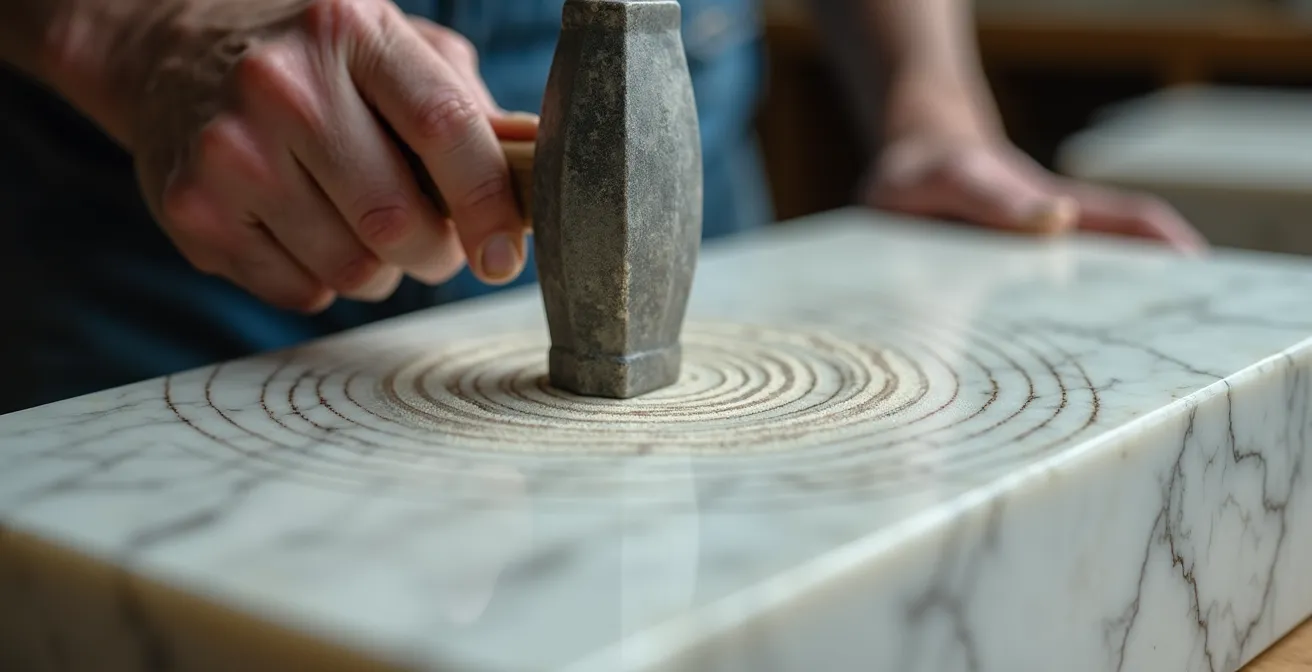
As the image demonstrates, the technique is about precision and careful listening. The point of contact sends vibrations through the material, and the quality of the returning sound is a direct indicator of what lies beneath. Any area that sounds suspect should be marked for further investigation or avoided entirely during carving. For a high-value commission, this simple test is the first and most critical step in risk management, preventing wasted hours of labor on a fundamentally flawed piece of stone.
Your Checklist for Sound-Testing a Marble Block
- Points of contact: Create a systematic grid pattern with 6-inch spacing across all stone faces to ensure complete coverage.
- Data Gathering: Using a wooden mallet for softer stones or a small ball-peen hammer for harder ones, tap each grid point, listening carefully for tonal variations.
- Anomaly Detection: Confront the expected clear, bell-like ring with any anomalies. Immediately mark any areas producing a dull, short thud, as these signal potential internal flaws.
- Flaw Visualization: To confirm and visualize suspected cracks, spray water on the marked areas. Flaws will absorb the water and appear as distinct dark lines against the lighter, non-porous surface.
- Action Plan: Based on the location and severity of identified flaws, decide whether to work around them, discard the block, or proceed to professional ultrasonic testing for a definitive analysis.
Cast Stone vs. Carved Stone: Which holds sharp detail better after 20 years outdoors?
While the romantic ideal often favors naturally carved stone like limestone or sandstone, for holding sharp detail over decades in a harsh environment, a high-quality cast stone will almost always outperform it. The key factor is not the material itself, but its porosity. Natural stones, particularly softer sedimentary ones, are porous. They act like a rigid sponge, absorbing water. In climates with freeze-thaw cycles, this absorbed water freezes, expands, and exerts immense pressure from within, causing microscopic pieces of the surface to spall or flake off. This process, known as frost weathering, slowly erodes sharp edges and fine details into soft, rounded forms.
Cast stone, by contrast, is a form of highly engineered concrete. While basic concrete is porous, architectural cast stone is manufactured under controlled conditions with specific admixtures that dramatically reduce water absorption. Its high density and low porosity mean that water stays on the surface rather than penetrating the material. This makes it far more resistant to the destructive power of freeze-thaw cycles. Furthermore, it is inherently more resistant to acidic deposition from rain, which can slowly dissolve the calcite binders in materials like marble and limestone.
As the Materials Science Research Team at the Journal of Architectural Materials Study notes, the environmental context is everything:
In regions with acid rain and freeze-thaw cycles, a high-density, low-porosity cast stone with specific admixtures will outperform a soft carved stone like limestone.
– Materials Science Research Team, Journal of Architectural Materials Study
Therefore, while a freshly carved limestone sculpture might initially display crisper detail, the cast stone piece is engineered for endurance. After 20 years of exposure to rain, ice, and pollution, the cast stone will have retained its sharp lines far more effectively, proving that sometimes the engineered solution is superior to the natural one for achieving artistic permanence.
The installation mistake of mixing metals that eats away sculpture bases
One of the most insidious and destructive mistakes in outdoor sculpture installation is mixing incompatible metals. Placing two different metals in direct contact, in the presence of an electrolyte like rainwater or even humidity, creates a galvanic cell—essentially, a small battery. This initiates a process called galvanic corrosion, where the less noble (more reactive) metal corrodes at an accelerated rate to protect the more noble metal. For a sculptor, this can mean a stainless steel bolt can literally eat away a bronze base.
A classic, large-scale example is the Statue of Liberty. During her 1980s restoration, engineers discovered that the original iron armature was in severe decay where it made contact with the copper skin. The iron, being less noble, had been sacrificing itself for over a century, causing a critical loss of structural integrity. As an analysis of the Statue of Liberty’s restoration shows, this bimetallic corrosion is a common failure point in monuments exposed to atmospheric moisture. The electrochemical potential between different metals is quantifiable; for instance, electrochemical measurements show that bronze and 304 stainless steel are 0.35V apart in the galvanic series, a significant difference that guarantees aggressive corrosion of the bronze if they are connected.
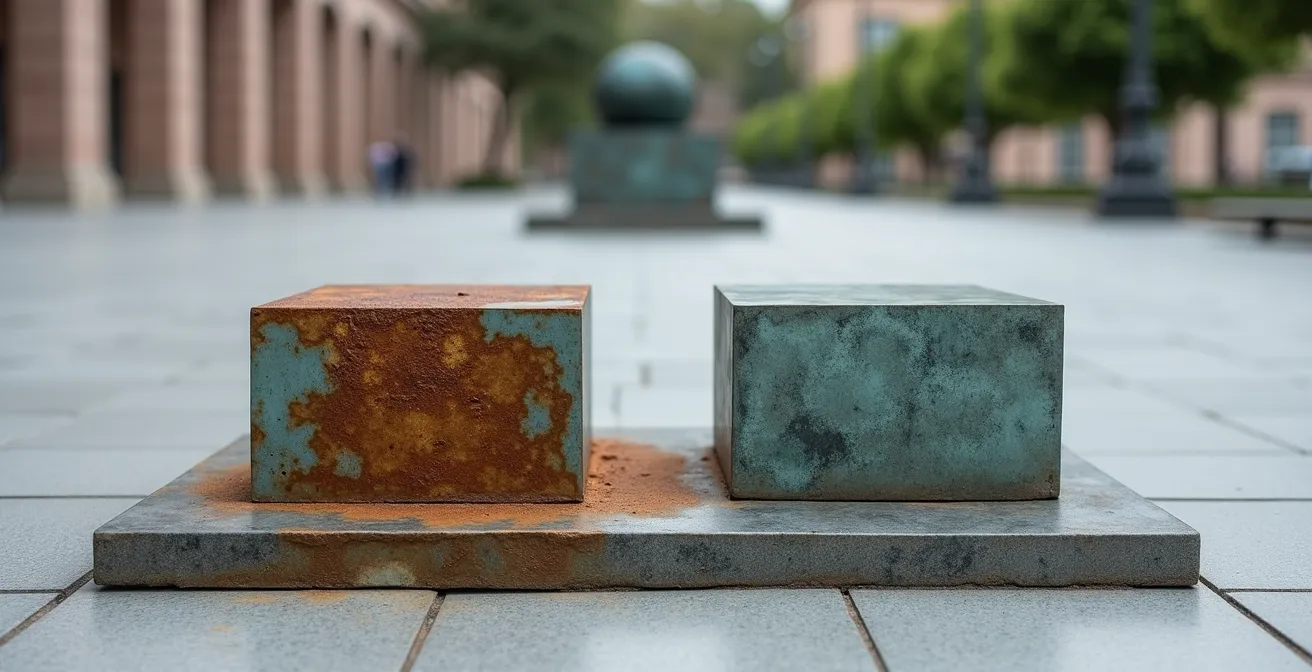
The solution is simple but absolutely critical: isolation. The metals must be electrically separated. This is achieved by using non-conductive washers, bushings, and gaskets made from materials like nylon, neoprene, or Teflon. As the image illustrates, this small, inexpensive detail prevents the flow of electrons between the metals, stopping the galvanic cell from forming. By isolating the stainless steel fasteners from the bronze sculpture, the corrosive reaction is halted before it can begin, protecting the artwork’s base for the long term.
How to calculate the center of gravity for a mixed-media sculpture to prevent tipping?
For any sculpture, but especially for a complex mixed-media piece with varying material densities, stability is paramount. A beautiful work that is top-heavy or has a poorly placed center of gravity (CG) is a constant tipping hazard. The center of gravity is the single imaginary point where the entire weight of the object can be considered to be concentrated. For a sculpture to be stable, a vertical line drawn downward from the CG must fall within the sculpture’s base of support, an area known as the stability polygon. If the CG moves outside this footprint, the sculpture will tip over.
While complex 3D modeling software can calculate CG digitally, there is a time-tested physical method that is both accurate and intuitive. It allows the artist to find the true balance point of the physical object itself. This method is particularly useful for asymmetrical or organically shaped works where mathematical calculation would be prohibitively complex.
The process, known as the plumb line method, involves suspending the object and letting gravity reveal its balance point:
- Secure Suspension: First, establish a strong, secure suspension point on the sculpture. It must be able to hold the entire weight of the piece without shifting.
- First Hang: Hang the sculpture from this point and allow it to come to a complete, motionless rest.
- First Plumb Line: Hang a plumb line (a weight on a string) from the exact same suspension point. Once it is still, mark the line it traces across the surface of the sculpture with a pencil or chalk.
- Second Hang: Take the sculpture down and hang it from a completely different point, preferably one that is roughly 90 degrees from the first.
- Second Plumb Line: Again, hang the plumb line from this new suspension point and mark its path. The point where this second line intersects the first line is the sculpture’s center of gravity. For three-dimensional confirmation, a third hang can be performed.
Once you have located this point, you can project it downwards to ensure it falls safely within the footprint of the base. If it is too close to the edge, the base must be widened or weight must be added low down to lower the overall CG, ensuring the work’s long-term physical stability.
Chemical Biocide vs. Soft Brushing: Which keeps the stone healthy longer?
When faced with biological growth like algae, moss, or lichen on an outdoor stone sculpture, the immediate impulse might be to use aggressive cleaning methods for a quick result. However, professional stone conservators understand that long-term stone health requires a “less is more” approach. The debate between chemical biocides and mechanical brushing is not an “either/or” choice but a question of correct procedure and escalation. The method that keeps the stone healthy longer is always the gentlest one that is effective.
The standard conservation sequence begins with the softest possible cleaning. This involves using natural-bristle brushes (never wire brushes) and clean water to gently remove surface debris and biological growth. This method respects the stone’s delicate patina and avoids creating surface damage. As the Stone Conservation Institute warns, aggressive cleaning is counterproductive:
While a single cleaning with a stiff brush or pressure washer seems effective, it creates microscopic scratches on the stone’s surface, making it more porous and a better home for future biological growth. This is why a sculpture often looks dirtier, faster, after an aggressive cleaning. It has been made more hospitable to the very organisms you tried to remove. Only after gentle cleaning has proven insufficient should a chemical intervention be considered.
If growth persists, the next step is a pH-neutral, non-ionic soap with distilled water. If that fails, targeted biocides are the final resort. Professional biocidal treatments like D/2 Architectural Biocidal Cleaner or specific Quaternary Ammonium Compounds are used because they work slowly, killing the organisms without damaging the stone, and can provide some residual protection. Choosing the right biocide is also key, as different chemicals are effective against different organisms (algae vs. lichen). Therefore, the answer is clear: soft brushing is the first and most important step for long-term health, with biocides reserved as a targeted, expert-level solution, not a starting point.
Matte Glaze vs. Glossy: Which stands up better to dishwasher abrasion?
While an outdoor sculpture will never see the inside of a dishwasher, the core of this question is about abrasion resistance, a critical factor for longevity. The “dishwasher test” is an industry standard for ceramic tableware to simulate years of harsh washing cycles. The underlying principle—how well a surface resists physical wear and tear—is directly applicable to an outdoor sculpture enduring wind-blown dust, grit, and periodic cleaning.
The answer generally lies in the glaze’s molecular structure. A well-formulated glossy glaze typically presents a harder, less porous surface than a matte glaze. During firing, a glossy glaze melts into a smooth, glass-like layer that is dense and highly durable. Its smoothness offers fewer microscopic peaks and valleys for abrasive particles to “catch” and wear away. Materials testing consistently demonstrates that well-formulated glossy glazes can present a 15-20% harder surface than their matte counterparts.
Matte glazes, by contrast, often achieve their lack of shine through the introduction of materials like alumina or barium that create a micro-crystalline or slightly rougher surface at the microscopic level. This very texture that diffuses light to create a matte effect can also be more susceptible to mechanical abrasion over time. However, it’s crucial to note that this is a generalization. A very high-quality, well-fired matte glaze can certainly outperform a poorly formulated or under-fired glossy glaze. The best practice is to test your specific glazes for your application.
- Create several test tiles with your candidate glazes, both matte and glossy.
- Fire the tiles according to specifications for a full and proper fusion.
- Mark a control area on each tile with tape.
- On the test area, scrub vigorously for a set time (e.g., one minute) with a mild abrasive like baking soda on a damp sponge.
- Wash the tiles and compare the abraded area to the control area under good light, looking for any change in sheen or surface texture. The glaze that shows the least change is the most durable.
For applications where durability and cleanability are paramount, a high-quality glossy glaze is usually the safer and more resilient choice.
Key Takeaways
- Tensile strength, not just weight, dictates a sculpture’s form and need for internal support.
- Invisible threats like internal cracks in stone and galvanic corrosion in metal are the real enemies of longevity.
- Long-term durability is engineered in the design phase, through choices like material porosity, hollow casting, and structural stability calculations.
How to Reduce Foundry Costs Without Sacrificing the Quality of the Cast?
Bronze casting is an expensive process, and for any large commission, cost management is a significant concern. However, reducing costs should never come at the expense of the artwork’s structural integrity or aesthetic quality. The most effective strategies for cost reduction happen long before any metal is melted, focusing on smart design and process optimization rather than cutting corners on materials.
The single biggest factor in foundry pricing is the weight of the metal used. Therefore, designing a sculpture to be hollow-cast is the most impactful way to save money. A properly engineered hollow sculpture with appropriate wall thickness is just as strong and permanent as a solid one but can use 40-60% less bronze. This also makes the final piece lighter and easier to transport and install. As the experts at the American Bronze Foundry point out, “The biggest savings happen before the metal is even melted – through designing hollow sculptures, optimizing wall thickness using 3D modeling, and designing pieces in sections that are easier to cast and weld.”
Other significant savings can be found in process choices. Optimizing the gating system (the channels through which molten bronze flows) can reduce metal waste by 15-25%. For larger, simpler forms, choosing sand casting over the higher-resolution ceramic shell method can reduce process costs by 30-40%, though this involves a trade-off in surface detail. The following table, based on data from professional foundry cost analyses, breaks down the primary strategies:
| Cost Reduction Strategy | Potential Savings | Quality Impact | Best Application |
|---|---|---|---|
| Hollow casting design | 40-60% metal reduction | None if walls properly sized | Large sculptures |
| Optimized gating system | 15-25% metal waste reduction | Improved with proper design | All projects |
| Sand casting vs ceramic shell | 30-40% process cost | Lower detail resolution | Simple, large forms |
| Sectional casting | 20-30% easier handling | Requires skilled welding | Monumental works |
| Alternative alloys (aluminum bronze) | 10-20% material cost | Different patina options | Specific applications |
By focusing on these intelligent design and process choices, an artist or collector can dramatically reduce foundry expenses without compromising the quality or longevity of the final bronze sculpture. It is about working smarter, not cheaper.
Frequently Asked Questions about sculpture stability
Can 3D modeling software calculate center of gravity for complex sculptures?
Yes, programs like Blender, Rhino, and ZBrush can automatically calculate the center of mass for complex virtual models, allowing artists to test stability before cutting any material.
What is the stability polygon and why does it matter?
The stability polygon is the footprint outline of your sculpture’s base. True stability requires the vertical line from the center of gravity to fall within this polygon area.
How do I calculate center of gravity during the design phase?
Use the weighted average method: divide your sculpture into simple geometric shapes, find each shape’s center of gravity and weight, then calculate the combined center using weighted averages.
Now that you understand the scientific principles of material longevity, the next step is to apply this knowledge to your specific project. Begin by auditing your design for these hidden risks to ensure your artistic vision becomes a permanent legacy.