
Upgrading to full-frame isn’t about getting “better” photos; it’s about accepting a difficult but potentially rewarding set of technical challenges.
- Superior low-light performance comes with the trade-off of heavier gear and more expensive lenses.
- The coveted shallow depth of field introduces significant focus-mastery challenges, especially at wide apertures.
Recommendation: Evaluate if your work truly requires the specific capabilities of full-frame, rather than assuming it’s a universal upgrade for composition.
Every semi-professional photographer reaches a crossroads. You’ve mastered your APS-C camera, but the allure of a full-frame sensor whispers promises of game-changing images. The forums and YouTube videos are filled with talk of superior “bokeh,” incredible low-light ability, and an undefinable “professional look.” It’s tempting to believe that a $3,000 investment is the final barrier between you and photographic greatness, the one thing that will finally fix your composition and elevate your work.
The common advice is to chase the technical specifications: more dynamic range, better high ISO performance, and shallower depth of field. These metrics are valid, but they are a dangerously incomplete picture. They feed the idea that the tool, not the artist, is the primary variable for success. This thinking leads to expensive purchases that often result in frustration rather than fulfillment, as the new gear introduces as many problems as it solves.
But what if the real question isn’t whether full-frame is “better,” but whether you are prepared for the new set of creative constraints it imposes? This article takes a skeptical, pragmatic look at the full-frame debate. We won’t just repeat the marketing points. Instead, we’ll dissect the real-world trade-offs in low light, lens selection, gear weight, and focus management. We’ll explore why a bigger sensor demands a higher level of technical mastery and how that demand can, for the right photographer, be a catalyst for growth.
This guide will navigate the complex realities of sensor technology, helping you decide if the full-frame path is a necessary step for your specific artistic vision, or a costly detour. We’ll examine the physics of light, the ergonomics of gear, and the discipline required to turn technical potential into artistic reality.
This article provides a detailed breakdown of the critical factors to consider when contemplating a move to a full-frame system. Below, you will find a summary of the key topics we will explore to help you make an informed, pragmatic decision.
Table of Contents: A Pragmatic Look at Full-Frame Camera Sensors
- Why fewer pixels on a larger sensor create cleaner images in low light?
- How to adjust your lens choices when moving from APS-C to Full Frame?
- BSI Sensors vs. Traditional CMOS: Does the architecture change the dynamic range?
- The heavy gear error that leads to leaving the camera at home
- How to manage the razor-thin focus plane of f/1.2 on a full-frame sensor?
- How to modify a standard DSLR camera for infrared art photography?
- Why UV filtering glass is not enough to stop all light damage?
- How to Transition from Darkroom Film to Digital RAW Without Losing Your “Look”?
Why fewer pixels on a larger sensor create cleaner images in low light?
The core advantage of full-frame sensors in low light isn’t magic; it’s physics. A full-frame sensor (typically 36x24mm) has a much larger surface area than an APS-C sensor (around 23x15mm). Even with the same megapixel count, the individual light-gathering sites, or pixels, on the full-frame sensor are significantly larger. Bigger pixels can capture more photons before they become saturated, which directly translates to a stronger signal and less digital noise. Think of it as having larger buckets in a rainstorm; they collect more water (light) and are less affected by random noise (electronic interference).
This physical advantage is quantifiable. Technical analysis shows that for a given amount of time and light, full-frame sensors capture significantly more light units than their smaller counterparts. This superior signal-to-noise ratio is what allows for cleaner files at high ISO settings like 6400, 12800, or even higher. While noise reduction software has improved, it can’t add information that was never captured. The full-frame sensor simply starts with more raw data, providing greater flexibility in post-production without degrading the image quality.
Case Study: Professional Low-Light Photography in Sub-Saharan Africa
To document energy poverty in Africa, where 620 million people live without electricity, photojournalist Pascal Maitre relied on a Canon EOS 5D Mark IV. He was able to create stunning 180cm-wide prints from images shot at an astonishing ISO 32,000. This real-world application demonstrates the exceptional low-light capabilities that modern full-frame sensors provide, enabling professional work in conditions that would be impossible with smaller sensors. His project is a testament to how the tool’s technical capacity enables the storytelling.
This isn’t just a numbers game; it has profound artistic implications. It means being able to shoot handheld in dimly lit chapels, capture the ambiance of a candlelit dinner without a flash, or freeze motion in indoor sports arenas. It opens up creative possibilities that are simply off-limits with less capable hardware. However, this power is the first step in a series of crucial trade-offs.
How to adjust your lens choices when moving from APS-C to Full Frame?
The transition from an APS-C to a full-frame system is often accompanied by a jarring realization: your lenses don’t look the same anymore. This isn’t an optical illusion; it’s the effect of the crop factor. An APS-C sensor effectively “crops in” on the image projected by the lens, typically by a factor of 1.5x or 1.6x. This means your trusty 50mm “nifty fifty” on an APS-C body behaves like a 75mm or 80mm portrait lens. When you mount that same 50mm on a full-frame camera, you see the field of view it was truly designed for—a much wider, “normal” perspective.
This forces a complete re-evaluation of your lens kit. The 18-55mm kit lens that covered your wide-to-short-telephoto needs is now insufficient. To get the same reach you had before, you need longer, and often significantly larger and more expensive, telephoto lenses. That versatile 35mm lens that acted as a 50mm equivalent now becomes a dedicated wide-angle lens. You must essentially relearn your focal lengths and rebuild your muscle memory for framing shots.
This adjustment goes beyond just the field of view. Lenses designed specifically for APS-C sensors (like Canon’s EF-S or Nikon’s DX series) project a smaller image circle. While some can be mounted on full-frame bodies, they will produce severe, unusable vignetting, forcing the camera into a “crop mode” that negates the very purpose of the larger sensor. This means a true upgrade to full-frame almost always requires a parallel, and often more costly, investment in full-frame compatible lenses.
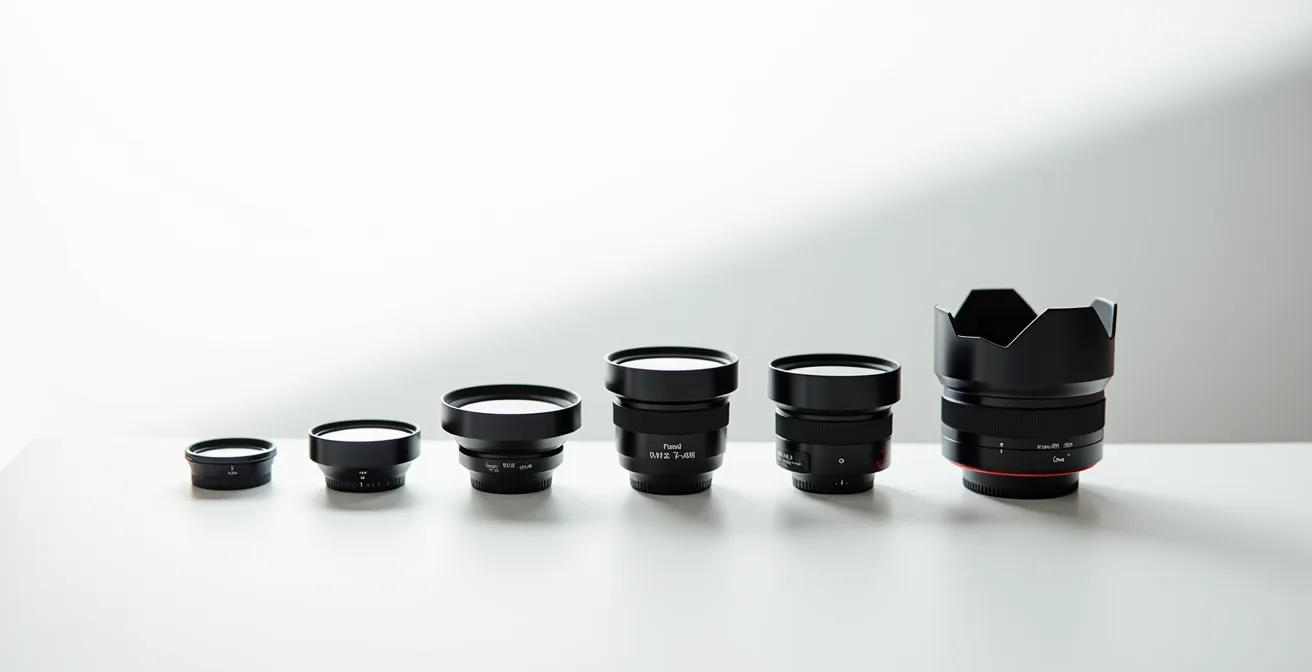
As the illustration above suggests, the physical reality is undeniable. Full-frame lenses, especially high-quality zooms and fast primes, are substantially larger and heavier. This shift is not just a line item on a budget; it’s a fundamental change to the ergonomics and portability of your entire photography system, a point we will explore in detail later.
BSI Sensors vs. Traditional CMOS: Does the architecture change the dynamic range?
While sensor size is the most discussed factor, the underlying architecture plays a crucial role in performance. For decades, the standard was the front-side illuminated (FSI) CMOS sensor. In this design, the metal wiring that transports data sits on top of the light-sensitive photodiode layer, partially obstructing the path of incoming photons. While data shows that over 90% of modern cameras use CMOS sensors, the type of CMOS matters immensely.
The advent of the back-side illuminated (BSI) sensor flipped this architecture on its head. By moving the wiring layer *behind* the photodiodes, BSI sensors create a clearer, more direct path for light. This seemingly simple change has profound effects. It significantly improves the quantum efficiency—the percentage of photons hitting the sensor that are actually converted into an electrical signal. This leads directly to better low-light performance and reduced noise, even when compared to an FSI sensor of the same size. It’s one of the key innovations that has pushed image quality forward in the last decade.
Does this change the dynamic range? Absolutely. Dynamic range is the camera’s ability to capture detail in both the brightest highlights and the deepest shadows of a single scene. Because BSI sensors collect light more efficiently, they generate a cleaner signal from the outset. This allows them to retain more information in the shadow areas without being overwhelmed by noise when you try to “lift” them in post-production. At the same time, the improved architecture often allows for better handling of highlights. As a result, modern full-frame BSI sensors can achieve a staggering 15+ stop dynamic range, giving photographers incredible latitude to recover seemingly lost details.
For a semi-pro, this means more confidence when shooting high-contrast scenes like sunsets, backlit portraits, or interior shots with bright windows. The benefits are clear:
- Enhanced light sensitivity: The back-illumination design allows more photons to reach the photosites.
- Improved readout speeds: This enables faster continuous shooting and reduces the “rolling shutter” effect in video.
- Better noise performance: Optimized architecture leads to cleaner images even at base ISO.
- Increased dynamic range: Superior highlight and shadow recovery gives more flexibility in editing.
The heavy gear error that leads to leaving the camera at home
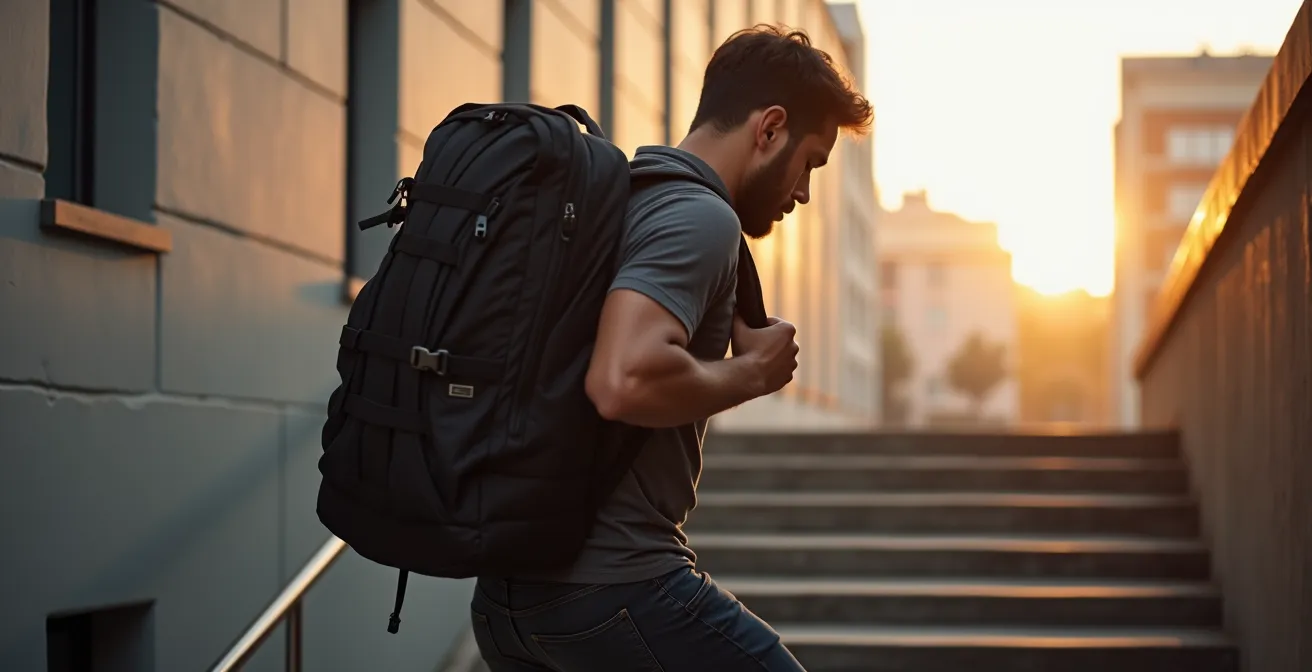
The spec sheets and online reviews often conveniently omit the most tangible trade-off of upgrading to full-frame: the sheer physical burden. The larger sensor necessitates larger lenses with more glass, which in turn requires a more robust and heavier camera body to support them. This creates a cascade effect that extends to your tripod, your bag, and your shoulders. It is a classic case of intentional friction—a system that is inherently less portable and demands more effort to use.
This isn’t a minor inconvenience; it’s a fundamental change to your relationship with photography. The lightweight APS-C kit you could sling over your shoulder for a spontaneous street photography session is replaced by a system that demands a dedicated, and heavy, camera bag. As photographer Tom Archer notes in The School of Photography Professional Guide: “When you start carrying around a full frame camera, 3 lenses and a tripod that will take its weight, you’ll notice the difference believe me!” This extra weight can transform photography from a joy into a chore.
The “heavy gear error” is the miscalculation that the best camera is the one with the best specs, when in reality, the best camera is the one you have with you. If your new $5,000 full-frame setup is so cumbersome that you hesitate to bring it on a hike, a family outing, or a trip, then it is objectively worse than the “inferior” camera that would have captured those moments.
This sentiment is echoed by professionals who have made the switch, only to reconsider. A professional’s experience shared on Fstoppers highlights this perfectly:
If you frequently find yourself on the move, shooting in less comfortable environments, or needing to carry your gear for extended periods, upgrading to full frame might not be the best option. I’ve found that while mirrorless full frame cameras are lighter than crop sensor DSLRs, once you attach a lens to these new cameras, you’ll hardly distinguish them from DSLR setups, regardless of the sensor size.
– Professional Photographer, Fstoppers
Before upgrading, you must honestly assess your shooting style. If portability and spontaneity are central to your work, a full-frame system may be a step backward, regardless of its technical prowess.
How to manage the razor-thin focus plane of f/1.2 on a full-frame sensor?
One of the most celebrated benefits of full-frame is the ability to achieve an extremely shallow depth of field, especially when paired with ultra-fast prime lenses like an f/1.4 or f/1.2. This creates the creamy, out-of-focus backgrounds (or “bokeh”) that make subjects pop. However, this creative effect comes with a steep technical price: an incredibly narrow plane of sharp focus. At f/1.2 on a full-frame sensor, the depth of field on a head-and-shoulders portrait can be less than a centimeter. This is not a tool for the faint of heart; it’s a challenge that requires immense focal plane discipline.
The old “focus-and-recompose” technique, a staple for many DSLR shooters, becomes almost unusable. The slight pivot of the camera after locking focus is enough to shift the razor-thin focal plane off the subject’s eye and onto their nose or ear, ruining the shot. As portrait photographer Manny Ortiz demonstrated, this effect is more pronounced on full-frame because, for an equivalent framing, the photographer must stand further back, which further compresses the depth of field. This demands a new level of technical mastery.
So, how do professionals manage this? It requires a deliberate and precise approach. The most reliable method is using single-point AF and manually moving the focus point directly over the subject’s eye with a joystick or touchscreen. This eliminates the need to recompose. While modern Eye-AF is a powerful tool, it’s not foolproof. It can sometimes grab an eyelash instead of the iris, or get confused in a group. For critical work, many pros still rely on the precision of manual point placement.
Furthermore, experienced photographers know when to sacrifice maximum aperture for a higher keeper rate. For a non-repeatable moment like a wedding ceremony or a key event, stopping down to f/2.0 or f/2.8 dramatically increases the depth of field, providing a crucial safety margin. This still delivers a professional-looking shallow depth of field but ensures the critical moments are sharp where it counts. Mastering a full-frame system isn’t about always shooting wide open; it’s about knowing precisely when and how to use that capability as a specific creative choice.
How to modify a standard DSLR camera for infrared art photography?
Venturing beyond the visible spectrum into infrared (IR) photography is a way to create truly unique, ethereal images. Standard digital cameras are designed to block IR light using an internal “hot mirror” or IR-cut filter to ensure accurate color reproduction. To capture the unseen world of infrared, this filter must be removed and replaced with one that only allows IR light to pass through. This is a delicate surgical procedure for your camera and is best left to professionals.
The process involves selecting a suitable camera body—often an older, less expensive DSLR or mirrorless model is ideal, as their internal filters can sometimes be weaker and they are less of a financial risk. Once you’ve chosen a body, you must find a reputable conversion service that specializes in this modification. They will carefully disassemble the camera, remove the stock IR-cut filter from the front of the sensor, and replace it with a specific IR-pass filter of your choice. The choice of filter wavelength (e.g., 720nm for standard IR, 850nm for a more dramatic black-and-white effect) will define the aesthetic of your images.

Once converted, the camera is permanently dedicated to infrared photography. A critical step is calibrating a custom white balance, as auto white balance will not function correctly. This is often done by taking a photo of green grass (which reflects a lot of IR light and appears white) and setting the custom white balance from that image. Additionally, not all lenses perform well for IR; some create a “hot spot” or a bright area in the center of the frame due to their coatings. Thorough testing of your lenses is essential.
Your Action Plan: The Path to Infrared Conversion
- Select a Body: Choose an older full-frame or APS-C DSLR body, as their internal IR-cut filters may be weaker and they represent a lower-risk investment.
- Research Services: Find and vet professional conversion services that specialize in IR modifications for your camera model.
- Choose Wavelength: Decide on your desired IR filter wavelength (e.g., 720nm for standard color IR or 850nm for high-contrast black and white).
- Test Lenses: After conversion, test all your lenses to identify any that produce “hot spot” artifacts, which are common with certain coatings in IR.
- Calibrate White Balance: Learn to set a custom white balance using a reference like green foliage to achieve the desired creative effect.
This modification transforms a standard camera into a specialized artistic tool, opening up a new dimension of creative expression that pushes beyond conventional photography.
Why UV filtering glass is not enough to stop all light damage?
A common misconception is that a simple UV filter on a lens or the glass covering the sensor provides complete protection from all forms of light-related image degradation. While these filters are effective at blocking ultraviolet radiation, they are powerless against other, more insidious optical problems: flare and ghosting. These phenomena occur when shooting into or near strong light sources, such as the sun, streetlights, or studio strobes. Stray light bounces around inside the multiple elements of a lens, creating non-image-forming light that manifests as washed-out, low-contrast areas (flare) or distinct reflections of the light source or aperture diaphragm (ghosting).
The sensor itself, with its stack of micro-lenses and filters, can also contribute to these internal reflections. As noted in the ProGrade Digital Sensor Technology Guide, the problem lies beyond simple filtering. The guide states that the sensor’s filters can’t prevent image degradation from flare and ghosting. This is where the quality of the lens becomes paramount. Advanced, multi-layered lens coatings (like Nikon’s Nano Crystal Coat or Canon’s Air Sphere Coating) are specifically engineered to minimize these internal reflections by controlling how light passes from one lens element to the next.
This is a critical distinction for a semi-pro photographer. Investing in a high-end full-frame body and then pairing it with a cheaply made, poorly coated lens is a recipe for disappointment. You might have a sensor capable of incredible dynamic range, but if your images are plagued by flare and a lack of contrast every time you shoot toward the light, that potential is wasted. The entire optical chain—from the front element of the lens to the surface of the sensor—must work in harmony.
Therefore, protection against “light damage” isn’t just about blocking invisible UV rays. It’s about preserving image contrast, color fidelity, and clarity in challenging lighting conditions. This is achieved not by a single filter, but by a sophisticated system of high-quality glass and advanced coatings found in professional-grade lenses, which are an inseparable part of a true full-frame system.
Key Takeaways
- A full-frame upgrade is a commitment to a new system of creative constraints, not a simple quality boost.
- The benefits of low-light performance and shallow depth of field are balanced by the significant trade-offs of increased gear weight and cost.
- Mastering a full-frame system requires developing new technical skills, particularly in precise focus management, to avoid common pitfalls.
How to Transition from Darkroom Film to Digital RAW Without Losing Your ‘Look’?
For photographers who honed their craft in a chemical darkroom, the transition to a digital workflow can feel like losing a part of their artistic identity. The specific grain structure of Tri-X, the rich saturation of Velvia, or the subtle tones of Portra were not just technical aspects; they were integral components of the final “look.” The fear is that the clean, clinical precision of a digital RAW file, especially from a modern full-frame sensor, will erase that signature aesthetic.
However, the key is to reframe the thinking. A RAW file is not a finished product; it is a digital negative. It contains a vast amount of image data, offering a different, but arguably more powerful, form of creative latitude than a film negative. The goal is not to make digital look exactly like film, but to use the powerful tools of digital post-production to achieve the *same artistic intent* that you previously achieved with film stocks and darkroom techniques.
This transition is less about the camera and more about the workflow. Choosing a camera brand known for its color science can be a helpful starting point, but the real work happens in software like Adobe Lightroom or Capture One. This is where you learn to control digital grain (which is distinct from digital noise), manipulate color channels with precision, and develop custom profiles that emulate the response curves of your favorite film stocks. A clean file from a full-frame sensor provides the best possible foundation for this work, offering maximum data to push and pull without falling apart.
To successfully preserve your aesthetic, a systematic approach is necessary:
- Choose a system with pleasing color science: Some brands are known for their film-like color rendering out of the camera.
- Always shoot in RAW: This maximizes your flexibility in post-production, akin to having the original film negative.
- Master digital grain vs. noise: Learn to distinguish between unwanted digital noise and aesthetically pleasing grain added in post.
- Develop custom color profiles: Create or purchase profiles that match the color, contrast, and grain characteristics of your favorite film stocks.
- Master RAW recovery techniques: Understand the unique ways digital files handle highlight and shadow recovery compared to film.
Ultimately, losing your “look” is a choice, not a necessity. By embracing the RAW file as a digital negative and mastering the new darkroom tools, you can translate your established film aesthetic into the digital realm, maintaining your unique artistic voice.
The decision to upgrade is not about chasing specs, but about a deliberate choice to adopt a new set of tools with their own unique challenges and rewards. The next logical step is to critically analyze your own shooting style and portfolio to determine if these specific challenges align with your artistic goals.