The delayed failure of a glaze is not bad luck; it’s a predictable materials science problem that can be permanently solved by mastering glaze-to-body fit.
- Crazing is caused by a mismatch in the Coefficient of Thermal Expansion (CTE), where the glaze shrinks more than the clay body upon cooling.
- True glaze durability comes from achieving a state of slight compression, actively preventing micro-cracks from forming and propagating over time.
Recommendation: Move beyond recipe-following and begin analyzing your glazes and clay bodies as an integrated system, focusing on CTE compatibility and controlled cooling to engineer longevity.
For any ceramicist, there are few disappointments as profound as pulling a seemingly perfect piece from the kiln, only to discover a web of fine cracks appearing on its surface weeks, months, or even years later. This phenomenon, known as crazing, is often treated with simple, reactive fixes. Many potters will hear generic advice like “just try another glaze” or “cool your kiln slower.” While not entirely wrong, these suggestions barely scratch the surface of a complex materials science issue. They address the symptoms, not the root cause, leaving you in a frustrating cycle of trial and error.
The truth is that glaze longevity is not a matter of chance. It’s a predictable outcome rooted in the fundamental physics and chemistry of your materials. The key isn’t just about preventing a defect in one firing; it’s about engineering a glaze that can withstand daily use, thermal changes, and the passage of time. This requires a shift in mindset: from a cook following a recipe to a scientist controlling variables. The real solution lies in understanding the intricate relationship between your glaze and your clay body, specifically their respective rates of expansion and contraction.
But what if the true secret to a craze-proof pot wasn’t just about finding a “good fit,” but about intentionally creating a state of beneficial stress known as glaze compression? This guide moves beyond the platitudes to provide a systematic, scientific framework. We will deconstruct the causes of common glaze failures, from crazing and shivering to crawling and chemical instability. By the end, you will have the knowledge to diagnose problems accurately, test for durability, and program your firings to create a robust, integrated ceramic surface built to last for decades.
For those who prefer a visual guide to the tools used in this scientific approach, the following video offers an excellent introduction to using modern software to analyze and recreate glazes, including historical ones, based on their chemical makeup.
This article is structured to build your expertise systematically, from understanding the fundamental cause of glaze fit issues to mastering advanced techniques for long-term durability and care. Explore the sections below to begin your journey from fixing defects to engineering permanence.
Contents: The Scientific Path to a Perfect, Long-Lasting Glaze
- Why your glaze doesn’t fit your clay body and pops off during cooling?
- How to test your own pottery for lead leaching without a lab?
- Matte Glaze vs. Glossy: Which stands up better to dishwasher abrasion?
- The application error that leaves bare patches of clay on your fired pot
- How to program a slow cool-down to grow micro-crystals for a harder surface?
- The layering mistake that turns copper-based greens black over time
- Cast Stone vs. Carved Stone: Which holds sharp detail better after 20 years outdoors?
- How to Use Antique Porcelain Daily Without Destroying Its Value?
Why your glaze doesn’t fit your clay body and pops off during cooling?
The core reason for glaze fit failure lies in a fundamental mismatch of the Coefficient of Thermal Expansion (CTE) between the clay body and the glaze. Think of CTE as the predictable rate at which a material expands when heated and contracts when cooled. For a durable, lasting bond, the glaze must contract slightly less than the clay body as it cools from its peak temperature in the kiln. This puts the glaze into a state of slight compression, effectively “squeezing” it onto the pot’s surface. This compressive force is highly desirable as it actively resists the formation of tension cracks.
When the opposite occurs—the glaze has a higher CTE and contracts more than the clay—it creates a state of tension. The glaze is stretched taut over the surface, like a rubber band pulled too tight. Eventually, this tension finds release in a network of fine cracks known as crazing. This isn’t just a cosmetic issue; research has measured that crazing can lead to a 300-400% reduction in the fired strength of the ware. An even more dramatic failure is shivering, which happens when the glaze’s CTE is far too low. Here, the clay body shrinks so much more than the glaze that the extreme compression forces the glaze to flake or pop off, especially at sharp edges and rims.
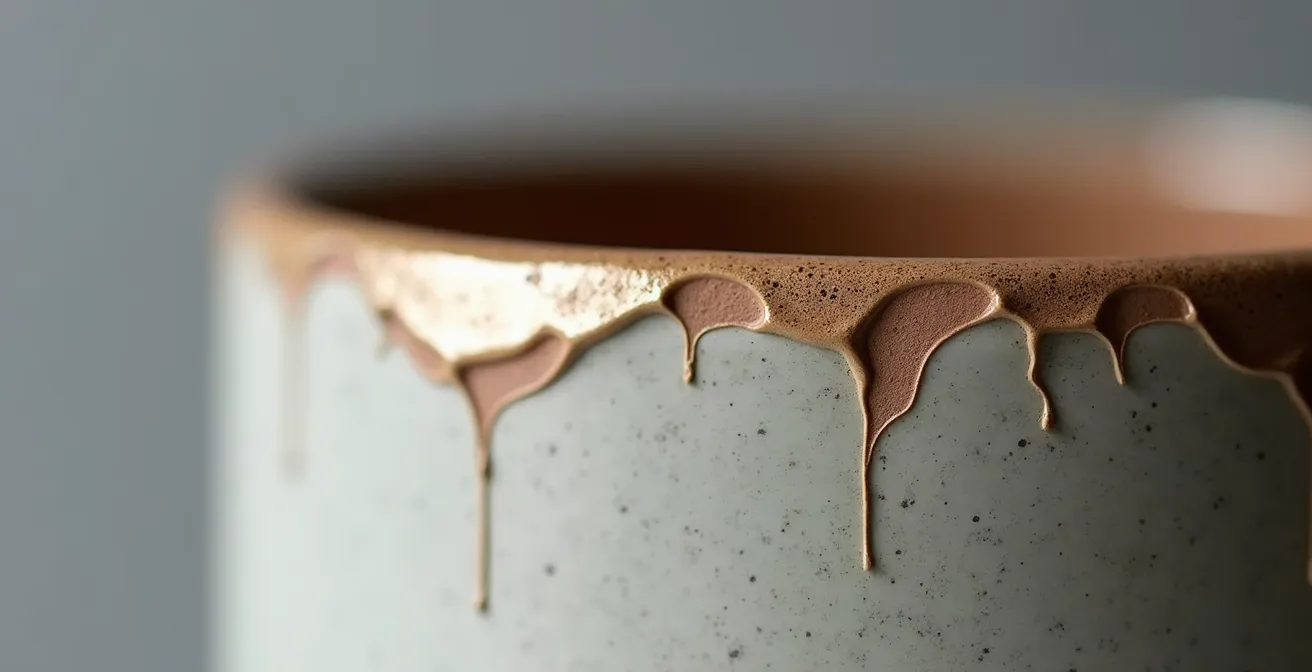
The image above clearly shows the sharp, flaking nature of shivering, which is distinct from the web-like pattern of crazing. Understanding the difference is the first step in diagnosis. Crazing is a tension failure (glaze shrinks too much), while shivering is a compression failure (glaze shrinks too little). The goal is to find the “Goldilocks zone”: enough compression for strength, but not so much that it leads to shivering.
How to test your own pottery for lead leaching without a lab?
Ensuring that functional pottery is food-safe is a non-negotiable responsibility for every ceramicist. While most modern commercial glazes are lead-free, if you mix your own glazes, use older recipes, or are unsure of a glaze’s origin, testing for lead and cadmium leaching is a critical step for ensuring long-term safety. While a certified lab test is the only way to achieve official FDA compliance, there is a reliable method that professionals use to screen their wares, which closely mimics the official standards.
The standard test involves exposing the glazed surface to a mild acid to simulate contact with acidic foods like tomatoes, citrus, or coffee over a prolonged period. A simple and effective way to conduct this at home is with a 4% acetic acid solution, which is essentially a slightly stronger, more pure form of household white vinegar. To perform the test, fill the fired vessel with this solution and let it sit for 24 hours at room temperature. After 24 hours, you can use an at-home lead test swab kit (available at hardware stores) on the surface that was in contact with the acid. Any color change on the swab indicates the presence of leached lead.
Case Study: Professional Pottery Studio Lead Testing Protocol
To ensure total compliance and customer safety, professional studios like Emerson Creek Pottery implement rigorous in-house testing. As detailed in their safety protocols, they utilize the 4% acetic acid test method to regularly check for any potential leaching. Even though their glazes are formulated to be free of lead and cadmium, they maintain a strict testing schedule on samples from various firings. This practice not only ensures they meet FDA and California Prop 65 standards but also creates an invaluable studio safety log. Each test result is documented and linked to a specific batch and firing schedule, providing a chain of evidence for the safety and stability of their work.
It’s crucial to remember that a crazed surface, even on a lead-free glaze, can pose a health risk. The cracks can harbor bacteria that are difficult to remove through normal washing. Therefore, achieving a stable, uncrazed glaze is the first line of defense for food safety, followed by diligent testing if the material composition is in any way uncertain.
Matte Glaze vs. Glossy: Which stands up better to dishwasher abrasion?
The choice between a matte and a glossy glaze often comes down to aesthetics, but for functional ware destined for daily use, durability is a far more critical factor. When it comes to standing up to the harsh environment of a dishwasher—with its high temperatures, abrasive detergents, and high-pressure water jets—not all glazes are created equal. The surface hardness and chemical stability of the fired glaze are paramount, and here, a well-formulated glossy glaze almost always outperforms a matte one.
The key distinction lies in the glaze’s microstructure. A durable glossy glaze is essentially a smooth, solid sheet of glass with high alumina and silica, giving it excellent chemical resistance and a hard surface (often 7+ on the Mohs scale). In contrast, many matte glazes achieve their non-reflective surface in one of two ways. A “true matte” develops micro-crystals (like calcium or alumina crystals) that scatter light, creating a durable but slightly less resistant surface. However, an “underfired matte” is simply a glaze that hasn’t fully melted. Its surface is porous and mechanically weak (3-4 on the Mohs scale), making it highly susceptible to staining, scratching, and chemical attack from detergents.
This table, based on extensive glaze chemistry analysis, breaks down the key differences in durability. It shows why a true, well-developed matte is acceptable for use, while an underfired matte is a recipe for long-term failure in a dishwasher environment.
| Property | True Matte (Alumina/Calcium Crystals) | Glossy High-Alumina | Underfired Matte |
|---|---|---|---|
| Mohs Hardness | 5-6 | 7+ | 3-4 |
| Dishwasher Resistance | Good | Excellent | Poor |
| Stain Resistance | Moderate | High | Low |
| Surface Texture | Uniform matte | Smooth reflective | Rough irregular |
| Chemical Durability | Good | Excellent | Poor |
Action Plan: Testing Glaze Durability for Dishwasher Use
- Perform the stain test: Apply a strong staining agent like coffee, tea, or turmeric paste to a test tile and leave it for 24 hours. A durable glaze will wipe clean with no residue.
- Check microhardness: Use a calibrated set of Mohs hardness picks to scratch the surface. Functional ware should ideally be at least a 6 or 7 to resist cutlery marks.
- Run an accelerated dishwasher test: Place a test tile in your dishwasher and run it through 50-100 cycles with a standard alkaline detergent. Look for any changes in color, gloss, or texture.
- Document surface changes: Use macro photography to take “before” and “after” shots of your test tiles to clearly identify any degradation of the glaze surface.
- Test chemical resistance: Expose the glaze to a 4% acetic acid solution for 24 hours. Any change in the surface gloss indicates poor chemical stability and unsuitability for food use.
The application error that leaves bare patches of clay on your fired pot
Crawling is a frustrating defect where the glaze pulls back on itself during firing, leaving ugly bare patches of the underlying clay body exposed. While its roots are in the physics of surface tension, the most common trigger is improper application technique. As the renowned ceramicist Robin Hopper explained, the problem starts long before the kiln is turned on.
Crawling is caused by a high index of surface tension in the melting glaze. It is triggered by adhesion problems, often caused by bad application.
– Robin Hopper, The Ceramic Spectrum
The glaze wants to stick to itself more than it wants to stick to the pot. This poor adhesion can be caused by a number of factors during the application process. The single biggest culprit is a contaminated bisque surface. Dust, oils from fingerprints, or any other residue will act as a barrier, preventing the wet glaze from forming a solid, uniform bond with the porous clay. Even if the glaze coat looks perfect when wet, these invisible barriers create weak points where the glaze will begin to pull away as it melts.
Another common mistake is applying the glaze too thickly. A very thick coat of glaze has a tendency to crack as it dries and shrinks. These small cracks become the starting points for crawling during the firing, as the melting glaze pulls back from these fissures. The solution lies in applying multiple thin, even coats, allowing each to dry completely. This builds up the desired thickness without creating the internal stresses that lead to crawling. To prevent this defect, a potter must focus on meticulous preparation and controlled application, including these key steps:
- Thoroughly clean the bisque: Wipe every piece with a damp, lint-free sponge right before glazing to remove all dust and oils.
- Apply thin, even coats: Whether dipping, pouring, or spraying, aim for multiple thin layers rather than one heavy application.
- Manage glaze chemistry: Adding a small amount (around 2%) of bentonite to your glaze recipe can increase its plasticity and help it adhere better in its raw state, reducing drying cracks.
- Control shrinkage: If your glaze is high in raw clay content like kaolin, it will shrink excessively as it dries. Using calcined kaolin instead of raw kaolin significantly reduces this shrinkage.
How to program a slow cool-down to grow micro-crystals for a harder surface?
While a fast cooling cycle can induce stress and crazing, a strategically programmed slow cool-down can do the opposite: it can actively improve the glaze’s strength and durability. This advanced technique isn’t just about avoiding thermal shock; it’s about intentionally growing a crystalline matrix within the glaze that makes the surface harder and more resistant to crazing. By holding the kiln at specific temperatures during the cooling phase, you give specific types of crystals the time they need to form and grow.
This is not a generic “slow cool” but a targeted process based on the glaze’s chemistry. Different crystals grow at different temperature ranges. For example, zinc-silicate crystals, known as Willemite, form a tough, interlocking network that is excellent at arresting the propagation of micro-cracks. These crystals thrive in a specific temperature window. Similarly, titanium in a glaze can form rutile crystals during cooling, which contribute to beautiful visual effects as well as hardness.
Case Study: Targeted Temperature Holds for Crystal Formation
Professional ceramicists leveraging glaze chemistry achieve remarkable durability through precise firing schedules. To promote zinc-silicate (Willemite) crystal growth for a harder surface, they program a slow cool and a dedicated “soak” or “hold” period between 1120°C and 1040°C (2048-1904°F). For developing titanium-based rutile crystals, a slower cooling rate through the 980-870°C (1796-1598°F) range is essential. Analysis using tools like the Stull Chart shows these temperature zones are optimal for creating a crystalline matrix. This matrix acts as a natural “crack-arrestor,” physically stopping the tiny crazes from spreading across the glaze surface, dramatically increasing the longevity of the ware.
By understanding your glaze chemistry, you can move from passively hoping for a good result to actively engineering a superior one. Here is a typical firing program designed to promote crystal growth in a cone 6 zinc-based glaze:
- Fire to peak temperature (e.g., Cone 6, ~1222°C or 2232°F) as normal.
- Begin a controlled cooling ramp at approximately 50-80°C (122-176°F) per hour from the peak temperature down to 1120°C (2048°F).
- Hold (soak) at the crystal formation temperature. For zinc glazes, this would be a hold anywhere between 1120°C and 1040°C for 2 to 4 hours.
- Continue a slow cooling ramp of around 25-50°C per hour through the remaining critical range down to about 800°C (1472°F).
- Below 500°C (932°F), allow the kiln to cool naturally to room temperature to avoid thermal shock.
The layering mistake that turns copper-based greens black over time
Copper is a versatile and beautiful colorant in glazes, capable of producing a stunning range of greens, blues, and even reds. However, it is also chemically sensitive, and a common mistake in glaze layering can cause a vibrant copper green to turn into a dull, muddy black. This failure is not a result of aging or use, but a chemical reaction that happens during the firing, caused by the interaction between adjacent glaze layers.
The problem arises when a copper-bearing glaze is layered over a glaze that is high in certain other elements, particularly zinc or calcium. These elements are highly reactive in the molten environment of the kiln and have a strong affinity for oxygen. As the glaze expert Linda Bloomfield explains, this can lead to an unintended chemical reduction.
Layering a copper glaze over a glaze high in zinc or calcium can cause those elements to ‘steal’ oxygen from the copper oxide during firing, reducing it to black metallic copper.
– Linda Bloomfield, Science for Potters
Essentially, the underlying glaze robs the copper oxide (CuO) of its oxygen atom, reducing it to pure, metallic copper (Cu), which appears black in a clear glaze base. This is the same principle behind creating copper reds in a fuel-fired reduction kiln, but here it happens unexpectedly within the glaze chemistry itself in an electric oxidation firing. To avoid this, you must be aware of the chemical makeup of the glazes you are layering. A copper green should never be applied directly over a high-zinc or high-calcium matte glaze if you want the color to remain stable.
Case Study: Stabilizing Copper Glazes Through Encapsulation
Experienced studio potters have found two effective methods to prevent this unwanted color shift and ensure the long-term stability of copper glazes. The first is to formulate the copper glaze itself within a robust, boron-balanced glass matrix. By ensuring the base glaze has sufficient alumina and silica, the copper particles are effectively “encapsulated” and protected from reacting with adjacent materials during firing. The second method, particularly for functional ware, is to use a stable, clear liner glaze on the interior of the pot. Then, the copper glaze is applied to the exterior. This creates a physical, impenetrable barrier that not only locks in the intended color but also prevents any potential reaction between the copper and acidic foods during use, ensuring both aesthetic and chemical stability.
Cast Stone vs. Carved Stone: Which holds sharp detail better after 20 years outdoors?
While a ceramicist’s primary medium is clay, powerful lessons can be drawn from other artistic disciplines, especially those concerned with permanence, like sculpture. The long-term battle against the elements fought by stone sculptors offers a crucial perspective on material science. Understanding how different stones retain sharp detail over decades provides a perfect analogy for how a well-formulated glaze and a well-vitrified body create a work that truly endures.
The ability of a material to resist erosion, weathering, and chemical attack depends on its density and internal structure. A hard, dense, crystalline stone like granite will hold a sharp edge for centuries, while a softer, more porous sedimentary stone like limestone will quickly lose its detail. The same principle applies directly to ceramics. A fully vitrified stoneware body, fired to maturity, is incredibly dense and non-porous, much like igneous rock. When paired with a glaze that is in a state of compression, it forms a unified, high-durability system.
The following table, which outlines the durability of various sculptural materials, highlights this principle. The materials with the highest durability scores have a dense, tightly-bound internal structure that resists degradation. This is the exact quality a ceramicist should aim for in their finished work.
| Material Type | Detail Retention (20 years) | Primary Failure Mode | Relative Durability Score |
|---|---|---|---|
| Crystalline Igneous (Granite) | 95-98% | Surface weathering | 10/10 |
| Metamorphic (Marble) | 85-90% | Chemical dissolution | 8/10 |
| High-Density GFRC Cast Stone | 80-85% | Binder degradation | 7/10 |
| Sedimentary (Limestone) | 70-75% | Granular disintegration | 6/10 |
| Standard Cast Concrete | 60-70% | Aggregate exposure | 5/10 |
The lesson for potters is clear: an underfired or poorly formulated piece behaves like soft limestone. It is porous, mechanically weak, and susceptible to failure from crazing, water absorption, and freeze-thaw cycles. A properly matured piece of stoneware with a compressed glaze, however, behaves like granite. It is a single, robust system engineered for longevity. The goal is not just an aesthetic fit, but a structural marriage of materials that can stand the test of time.
Key Takeaways
- Glaze crazing is a tension failure caused by a CTE mismatch; the ultimate goal is a glaze in slight compression.
- True glaze durability encompasses both physical hardness (abrasion resistance) and chemical stability (resistance to leaching and stains).
- Advanced firing schedules with slow cooling and targeted temperature holds can actively build a stronger, harder glaze by promoting micro-crystal growth.
How to Use Antique Porcelain Daily Without Destroying Its Value?
Owning and using antique porcelain can be a great joy, but it comes with the responsibility of preservation. These pieces are often fragile relics of a different era of ceramic technology. Many antique glazes are in a state of tension and are highly prone to crazing, and their bodies can be sensitive to sudden temperature changes. The single greatest threat to their longevity in daily use is not impact, but thermal shock.
The delicate structure of an old porcelain cup simply cannot handle the stress of being rapidly heated. As the experts at the Smithsonian’s Museum Conservation Institute warn, a common daily ritual can be catastrophic for these objects.
Pouring hot coffee into a cold antique cup is the single fastest way to cause micro-crazing and catastrophic failure. Pre-warming pieces safely is essential.
– Museum Conservation Institute, Smithsonian Guidelines for Ceramic Care
This sudden expansion of the inner surface while the outer surface remains cold creates immense stress that will either initiate crazing or cause existing micro-cracks to expand, eventually leading to the piece breaking. The same principle applies to washing: plunging a room-temperature piece into hot dishwater is equally dangerous. To use these pieces safely, you must adopt the gentle, methodical approach of a museum conservator.
A professional cleaning protocol for antique ceramics is designed entirely around minimizing stress. It avoids not only thermal shock but also chemical and physical abrasion. Following these steps can allow you to enjoy your antique ware while ensuring it survives for future generations:
- Pre-warm pieces gradually: Before pouring in any hot liquid, run the cup under room-temperature tap water, then gradually increase the water temperature. Never subject the piece to a sudden temperature change of more than 40°C (72°F).
- Clean with gentle, specific materials: Use only deionized or distilled water and a pH-neutral, conservator-approved soap like Orvus Paste. Modern dish soaps contain harsh detergents that can damage delicate surfaces.
- Use soft sponges only: Never use abrasive pads, stiff brushes, or any material that could scratch the glaze or gilded details. A soft, natural sponge is ideal.
- Dry immediately: Do not let pieces air dry. Use a soft, lint-free cloth to dry them immediately to prevent water spots and mineral deposits.
- Inspect for old repairs: Before any use, it can be wise to inspect the piece under a UV blacklight. Old adhesives used for repairs will often fluoresce, revealing hidden points of weakness.
By applying these scientific principles—from initial formulation and firing to long-term care—you can move from being a victim of glaze defects to being the master of your materials. The next logical step is to begin systematically testing your own glazes and firing schedules to build a library of stable, durable, and beautiful results.