
Successfully interpreting infrared reflectograms is not about magically revealing secrets, but about systematically understanding how materials interact with light to separate an artist’s original plan from later additions and physical artifacts.
- Infrared light penetrates many paint layers but is absorbed by carbon-based underdrawings, making them visible.
- Distinguishing a true underdrawing (signal) from artifacts like varnish pooling (noise) is the most critical interpretation skill.
- IRR is one tool in a kit; comparing its findings with X-ray, UV, and pigment analysis provides a complete picture of an artwork’s history.
Recommendation: Approach every reflectogram as a forensic document. Question every line and anomaly by comparing it against the visible painting and other technical images to build a conclusive argument about the artist’s process.
To the untrained eye, a painting is a finished, static object. But for an art historian or conservator, its surface is merely the final chapter of a story filled with edits, second thoughts, and abandoned ideas. The ability to read this hidden narrative is a fundamental skill, and Infrared Reflectography (IRR) is one of the most powerful tools for the job. It allows us to peer through layers of paint to reveal the artist’s original sketch, known as the underdrawing. These changes of mind, or pentimenti, are the ghostly traces of the creative process in action.
Many beginners believe IRR is a simple “x-ray vision” for art. They expect clear, unambiguous lines to appear, revealing a lost drawing. The reality is far more complex and fascinating. Interpreting a reflectogram is an analytical skill, closer to forensic science than to magic. It requires a foundational understanding of material physics, a keen eye for subtle visual cues, and a healthy dose of skepticism. The most significant discoveries are often made not by what you see, but by understanding *why* you are seeing it.
This guide moves beyond the simple definition of IRR. Instead of just stating that it “sees underdrawings,” we will explore the science that makes it possible and the practical challenges that can lead a researcher astray. The true key to interpretation is learning to distinguish the meaningful signal of an artist’s hand from the visual noise of aging materials and imaging artifacts. By mastering this, you can move from a passive observer to an active investigator of an artwork’s secret history.
This article will guide you through the essential knowledge needed to begin interpreting these complex images. We will cover the physics of how IRR works, the equipment required, its relationship to other imaging techniques, and the common pitfalls to avoid. The following sections provide a structured path to building your analytical confidence.
Summary: How to Interpret Infrared Reflectograms to See Artist Changes (Pentimenti)?
- Why infrared light sees through paint but stops at charcoal underdrawings?
- How to modify a standard DSLR camera for infrared art photography?
- Infrared vs. X-Ray: Which reveals the underdrawing and which reveals the lead white?
- The common analysis error where varnish pooling looks like a retouching
- How to light a painting for IR to avoid glare obscuring the underdrawing?
- Carbon dating vs. Pigment analysis: Which method is foolproof for 20th-century art?
- Why a 2-inch thumbnail sketch saves you $100 in wasted oil paint?
- Why Van Gogh’s Yellows Are Turning Brown and How to Slow It Down?
Why infrared light sees through paint but stops at charcoal underdrawings?
The entire principle of infrared reflectography hinges on a simple quirk of material physics: different materials behave differently at specific wavelengths of light. The visible spectrum is only a small fraction of the electromagnetic spectrum, and a huge amount of energy exists in the non-visible infrared range. In fact, specific research on infrared reflective pigments reveals that over half of the sun’s energy reaching Earth is in the infrared range. It is within this range, specifically between 900 and 1800 nanometers, that the magic happens.
Most paint pigments—especially those used from the Renaissance through the 19th century—become increasingly transparent at these longer wavelengths. Their chemical structure doesn’t absorb or reflect this type of energy, allowing the infrared radiation to pass through them as if they were glass. However, materials rich in carbon, such as charcoal, black ink, or graphite, are strong absorbers of infrared radiation. When the IR light hits the carbon-based underdrawing on the canvas or panel, it is absorbed rather than reflected back to the camera’s sensor. This difference in absorption creates the contrast we see in a reflectogram: the light-colored, reflective ground layer appears white, while the dark, absorptive underdrawing appears black.
Case Study: The Hidden Composition in Leonardo’s “Virgin of the Rocks”
A prime example of this technique’s power was the analysis of Leonardo da Vinci’s “Virgin of the Rocks” at the National Gallery in London. For years, it was debated whether this was a copy of the Louvre version. Infrared reflectography revealed a completely different initial composition drawn underneath the painted surface. The artist had originally sketched an angel and the infant Christ in different positions, with the Virgin’s hand in a different gesture. These major changes, or pentimenti, proved that the artist was actively developing the composition on the panel itself, a hallmark of an original work, not a simple copy.
Essentially, you are not seeing “through” the paint in the way an X-ray penetrates matter. Instead, you are seeing a “map” of where carbon exists on the preparatory layer. Understanding this principle is the first step to accurate interpretation, as it helps you recognize that what you are seeing is a specific material interaction, not a simple photograph.
How to modify a standard DSLR camera for infrared art photography?
While dedicated scientific imaging systems offer the best results, it is entirely possible to perform high-quality infrared reflectography with a standard DSLR camera, provided it undergoes a specific modification. Consumer digital cameras are designed to capture visible light and are factory-fitted with an internal “hot mirror” or IR-cut filter positioned directly over the sensor. Its job is to block infrared light to prevent it from contaminating the color accuracy of a normal photograph.
To turn the camera into an IR-sensitive device, this filter must be removed. This is a delicate procedure often best left to specialized companies, as it involves disassembling the camera body and exposing the sensor. Once the internal IR-cut filter is gone, the camera becomes “full spectrum,” meaning its sensor can now “see” from the ultraviolet, through the visible, and deep into the infrared range. To isolate the specific wavelengths needed for IRR, an external IR-pass filter is then screwed onto the front of the lens. This filter does the opposite of the one that was removed: it blocks visible light while allowing infrared light to pass through to the now-sensitive sensor.
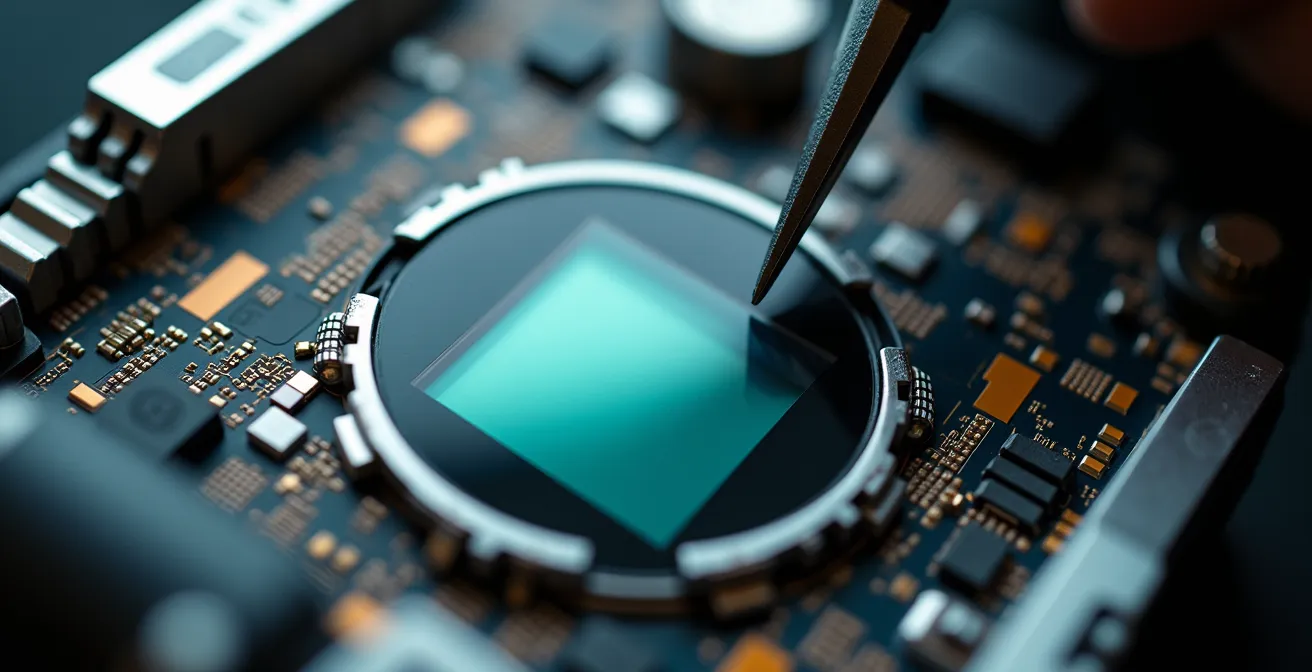
This section is highly technical, so visualizing the components is key. The image below shows a macro view of the internal sensor area where this critical modification takes place.
Once the hardware is set up, the final step involves using incandescent or halogen lamps, as they produce a broad spectrum of infrared radiation. The resulting images will often appear in “false color” (usually red or purple) on the camera’s display, which is then converted to a grayscale image in post-production software to create the final, interpretable reflectogram.
Your Action Plan: The Steps for DSLR Infrared Conversion
- Remove the IR-cut filter: This is the most critical step. The filter is located directly in front of the camera’s sensor and must be physically taken out. This is a delicate operation, often best performed by a professional service to avoid damaging the sensor.
- Acquire an IR-pass filter: After modification, the camera is sensitive to all light. You must use an external filter on the lens that blocks visible light and allows only infrared wavelengths (typically 720nm or higher) to reach the sensor.
- Secure a standard UV/IR-cut filter: For taking normal color photographs with your modified camera, you will now need an external filter that re-blocks the IR and UV light, essentially replicating the function of the filter you removed.
- Set up appropriate lighting: Standard LED lights or flashguns produce very little infrared. You must use a continuous light source that is rich in IR, such as tungsten-halogen lamps or incandescent bulbs.
- Configure post-processing: The raw images from the camera will be in false color. You need to use software like Photoshop or GIMP to convert the image to grayscale, adjust levels, and optimize contrast to make the underdrawing clearly visible.
Infrared vs. X-Ray: Which reveals the underdrawing and which reveals the lead white?
As a researcher, it is crucial to understand that infrared reflectography is just one tool in the non-invasive analysis toolkit. Its findings are most powerful when compared with other imaging methods, especially X-ray radiography. A common point of confusion for students is what each technique actually reveals. They are not interchangeable; they look for completely different materials and provide complementary information about a painting’s structure and history.
Infrared reflectograms capture the stages of making, from under-drawing to final paint layer, allowing researchers and connoisseurs to observe the evolution of a painting’s composition.
– National Academy of Sciences, Scientific Examination of Art: Modern Techniques
Infrared Reflectography (IRR), as we’ve discussed, is a light-based technique that detects carbon-based materials. It is ideal for visualizing the artist’s initial sketch, whether made in charcoal, ink, or graphite. Because it operates on the principle of light absorption and reflection, its penetration is limited to the upper paint layers.
X-ray Radiography, on the other hand, is not based on light but on density. X-rays are high-energy radiation that pass through the entire painting, including the canvas and stretcher bars. They are absorbed not by carbon, but by heavy, dense materials. The most common of these in historical paintings is lead white, a pigment used extensively for grounds, highlights, and for adding body to other colors. In an X-ray image, areas with thick applications of lead white will appear bright, while areas with less dense materials will appear dark. Therefore, X-rays are excellent for revealing structural changes, repairs to the canvas, or earlier compositions that were painted over using lead-heavy paints.
The following table, based on findings from conservation science, summarizes the key differences. This information is critical, as a comparative analysis of imaging techniques is fundamental to a thorough examination.
| Feature | Infrared Reflectography | X-Ray Radiography |
|---|---|---|
| Primary Detection | Carbon-based underdrawings | Dense materials (lead white) |
| Wavelength Range | 900-1800nm (SWIR) | 0.01-10nm |
| Penetration Depth | Surface paint layers | Entire painting thickness |
| Best For | Pentimenti, sketches | Structural changes |
The common analysis error where varnish pooling looks like a retouching
One of the most frequent and misleading errors in interpreting reflectograms is mistaking an artifact of aging for an artist’s mark. As paintings age, the layers of natural resin varnish applied to their surface can degrade. This varnish can darken, crack, and, most problematically for IRR, it can pool in the recesses of the paint’s texture (the impasto). Over decades or centuries, these pools of darkened varnish can become quite concentrated.
Because this concentrated, aged resin is dark and organic, it can absorb infrared radiation in a way that is strikingly similar to carbon-based ink or paint. In a reflectogram, these pools and drips can appear as dark, deliberate-looking lines or patches. A researcher looking at an IR image for the first time might excitedly identify these marks as a hidden signature, a subtle retouching, or part of the original underdrawing. In reality, they are seeing nothing more than visual noise created by the painting’s conservation history and material decay.
So, how do you differentiate the signal from the noise? The key is comparative analysis. First, carefully compare the reflectogram with the high-resolution visible light photograph. If the dark mark in the IR image corresponds perfectly to the deepest crevice of a brushstroke or a crack in the paint surface, it is highly likely to be pooled varnish. An artist’s underdrawing line typically has its own logic and flow, independent of the final paint texture. Second, if available, an ultraviolet (UV) fluorescence image can be invaluable. Natural resins fluoresce brightly under UV light, and areas of thick, pooled varnish will often show up as distinct bright patches, confirming their identity and ruling them out as part of the underdrawing.
How to light a painting for IR to avoid glare obscuring the underdrawing?
Capturing a clean, usable reflectogram is impossible without proper lighting. The primary enemy in any form of art photography is glare, or specular reflection. This is the mirror-like shine that occurs when light bounces directly off a glossy surface—like a varnished painting—and into the camera lens. This glare can completely obscure the faint details of an underdrawing, rendering the image useless. The solution lies in a technique called cross-polarization.
The setup involves placing polarizing filters over both the light sources and the camera lens. Light is an electromagnetic wave that vibrates in all directions. A polarizing filter acts like a gate, allowing only the light vibrating in one specific direction to pass through. For cross-polarization, you first place polarizing sheets over your two tungsten-halogen lamps, which are positioned at a 45-degree angle to the painting’s surface. These filters are oriented to let, for example, only vertically vibrating light hit the painting.
The light that reflects off the matte, diffuse parts of the painting becomes scattered, vibrating in all directions again. However, the light that causes specular glare retains its polarization—it bounces off the glossy varnish like a mirror and remains vertically polarized. You then place a second polarizing filter on your camera lens, oriented at a 90-degree angle to the filters on the lights (e.g., horizontally). This “crossed” filter blocks all the vertically polarized glare, while still allowing a portion of the scattered, depolarized light from the painting itself to pass through. The result, as visualized in the image below, is a perfectly matte, glare-free view of the painting’s surface.

This technique is absolutely essential for high-quality IRR. It ensures that every detail is captured with maximum clarity, which is especially important when creating a high-resolution composite image from many individual shots. For instance, the Osiris camera system achieves its detailed results by stitching together dozens of smaller, perfectly lit reflectograms into one large file, a process that would fail if glare were present in any of the constituent images.
Carbon dating vs. Pigment analysis: Which method is foolproof for 20th-century art?
When it comes to authenticating artworks, especially modern ones, a common misconception is that Carbon-14 dating is the ultimate test. While powerful for ancient artifacts, carbon dating is notoriously unreliable for 20th-century objects. The “bomb pulse”—a massive spike in atmospheric Carbon-14 caused by nuclear weapons testing from the 1950s onwards—has completely skewed the natural baseline, making it nearly impossible to get a precise date for anything created in the last 70 years. Furthermore, the amount of organic carbon in a thin paint layer is often too small and easily contaminated to yield a trustworthy result.
A far more foolproof method for 20th-century art is pigment analysis. This technique relies on identifying the specific chemical makeup of the pigments used in the painting. Art history has a well-documented timeline of when specific pigments were invented, manufactured, and discontinued. Finding a pigment in a painting that purports to be from a certain era, when that pigment did not yet exist, is a definitive sign of a forgery. This is the principle of anachronism detection.
For example, a key indicator for 20th-century fakes of older works is the presence of modern extenders and fillers in pigments. As technical analysis reveals, the compound barium sulfate was widely introduced as a filler in lead white paint (creating a mixture called Venice White) only in the 19th and 20th centuries. Its presence in a painting claimed to be from the 17th century is a dead giveaway.
Case Study: The Palmer Triptych Forgery
The power of pigment analysis was demonstrated in the case of the Palmer Triptych, a work once thought to be an early Netherlandish panel. Scientific analysis revealed that the white paint used was not pure lead white, but a combination of lead white and barium sulfate. Since barium sulfate is a synthetic pigment only manufactured since the early nineteenth century, its presence was a clear anachronism. This single piece of chemical evidence proved that the work could not have been created in the 15th or 16th century and was, in fact, a 20th-century forgery.
For the art researcher, this distinction is critical. While infrared can reveal a forger’s attempt to copy a style, it is pigment analysis that often provides the irrefutable, scientific proof of the work’s true age.
Why a 2-inch thumbnail sketch saves you $100 in wasted oil paint?
While technical analysis reveals an artist’s process long after the work is complete, it also underscores the importance of the planning that happens before the first drop of paint ever touches the canvas. The underdrawing we see with IRR is often the final, scaled-up version of a much smaller, more experimental drawing: the thumbnail sketch. For any practicing artist, and for any researcher seeking to understand their process, the value of this preliminary step cannot be overstated.
A thumbnail sketch is a small, quick drawing (often no larger than two inches) used to work out the fundamental compositional and value structure of a painting. The goal is not detail, but clarity. By working at a small scale, an artist can test multiple arrangements of a scene, solve problems of balance and flow, and establish a powerful light and dark pattern (a “Notan”) without committing time or expensive materials. A tube of high-quality oil paint can be costly; resolving a major compositional flaw on a large canvas might require scraping off and wasting a significant amount of it. Solving that same problem in a 2-inch pencil sketch costs virtually nothing.
This planning stage is a form of risk management for the creative process. It separates the problem of *what* to paint from *how* to paint it. Infrared reflectography often shows us a confident, flowing underdrawing precisely because the artist resolved all their major uncertainties in these preliminary sketches. The underdrawing is the plan; the thumbnail is the blueprint for that plan.
Your Action Plan: Auditing Your Composition with Thumbnail Sketches
- Points of Contact (Compositional Ideas): Before drawing, list all the essential elements you want to include in the final piece. Identify the main subject, background elements, and the primary emotional focus.
- Collection (Initial Sketches): On a single sheet of paper, create at least five different 2-inch thumbnail sketches, quickly exploring different arrangements and viewpoints for your listed elements. Don’t erase; just keep iterating.
- Coherence (Value Study): Select the two or three most promising compositions. Recreate them as pure black-and-white value studies (Notan). This forces you to confirm that the underlying light and dark structure is strong and readable, independent of color.
- Memorability/Emotion (Color Study): For the single strongest value composition, create a small, rough color study. This allows you to test your color palette and ensure it creates the intended mood and harmony before mixing large quantities of paint.
- Integration Plan (Canvas Transfer): With a fully resolved composition, value structure, and color plan, you can now confidently scale and transfer your final design to the canvas as a clear underdrawing, ready for painting.
Key Takeaways
- Infrared Reflectography (IRR) works because carbon-based underdrawings absorb IR light, while most paint pigments are transparent to it.
- Accurate interpretation requires distinguishing the artist’s marks (signal) from artifacts like varnish pooling and paint texture (noise).
- IRR is a comparative tool. Its full value is unlocked when analyzed alongside visible light, X-ray, and pigment analysis to build a complete history of the artwork.
Why Van Gogh’s Yellows Are Turning Brown and How to Slow It Down?
Technical art analysis extends far beyond the discovery of pentimenti. It plays a critical, ongoing role in conservation by helping us understand and mitigate the degradation of the artworks themselves. A poignant example is the fate of the brilliant yellows in many of Vincent van Gogh’s masterpieces. The artist famously used a then-new industrial pigment called chrome yellow for its intense luminosity, but a specific variety of this pigment has a tragic chemical instability.
Scientific studies have revealed the core of the problem. A specific type of light-sensitive chrome yellow, which contains sulfur, undergoes a chemical reduction when exposed to light, particularly UV radiation. Detailed analysis of Van Gogh’s “Sunflowers” identified this exact process, where the chromium in the pigment darkens from its bright yellow Cr(VI) state to a muddy brownish-green Cr(III) state. This degradation is most pronounced at the very top layer of the paint, especially at the interface where it meets the varnish.
This presents a major challenge for conservators. The very act of exhibiting a painting exposes it to the light that fuels its decay. The primary method for slowing this process is through strict environmental control: displaying the paintings under low, UV-filtered light levels and carefully managing humidity. Another significant complication is the history of past conservation efforts, as many of these paintings were varnished by later owners or galleries, a practice Van Gogh himself did not typically use.
Many of Van Gogh’s French period paintings have been inappropriately varnished in the past and removal of these non-original varnish layers is one of the challenges facing conservators on a world-wide basis today.
– Ella Hendriks, Head of Conservation, Van Gogh Museum Amsterdam
The challenge lies in the fact that this darkening process is irreversible. The role of technical analysis here is twofold: first, to identify which paintings contain the unstable form of chrome yellow, and second, to monitor the rate of change. By understanding the material science, museums can make informed decisions to preserve the color and vibrancy of these iconic works for as long as possible, balancing the need for public access with the duty of preservation.
By now, it should be clear that interpreting the hidden layers of a painting is a multi-faceted discipline. It demands not only a knowledge of art history but also a solid grounding in the scientific principles of the tools you use. Approaching a reflectogram, or any technical image, with a critical and inquisitive mindset is the most important step. Question what you see, seek corroborating evidence from other analytical methods, and you will begin to unlock the rich stories that lie just beneath the surface.