The first sign of canvas rot is not visual; it’s the invisible loss of structural integrity and tensile strength.
- An antique canvas is an active, hygroscopic material constantly reacting to environmental shifts, causing stress that leads to paint failure.
- Common “fixes” like tightening keys often mask deeper fiber degradation, creating a false sense of security while the underlying structure fails.
Recommendation: Shift from surface-level inspection to a diagnostic assessment of the canvas’s mechanical and chemical health to intervene before damage becomes catastrophic.
To a collector or conservator, a painting can appear stable one day and show signs of catastrophic failure the next. A subtle bulge, a new network of cracks—these are not sudden events but the final, visible symptoms of a long, slow decay happening within the very fabric of the support. The common approach involves looking for discoloration or flaking paint, and perhaps tightening the stretcher keys to address a bit of sagging. But this is like treating a fever without diagnosing the infection. The real threat lies in the invisible processes that are silently compromising the canvas itself.
The core issue is a fundamental misunderstanding of the material. An old canvas is not a passive, inert surface. It is a dynamic, organic system under constant tension, composed of hygroscopic fibers that swell and shrink with every change in the environment. Its structural integrity is a finite resource, actively degrading over time. Ignoring this reality in favor of simple, surface-level fixes is a direct path to irreversible damage, where the paint layer, having lost its foundation, begins to tent, flake, and ultimately detach.
This guide offers a different perspective, a diagnostic framework for the urgent task of assessing an antique canvas. Instead of just looking at the paint, we will look through it, to the support structure beneath. This is not about simple repairs, but about understanding the mechanics of failure. We will shift the focus from visible symptoms to the underlying causes: the loss of tensile strength, the catastrophic effects of humidity, the hidden dangers in historical materials, and the critical difference between invasive and preservation-focused interventions. By learning to read these deeper signs, you can move from reactive repair to proactive preservation, stopping the rot before it claims the artwork.
This article provides a detailed diagnostic framework for assessing the health of an antique canvas. Explore the sections below to understand the key failure points and the professional-grade interventions required for long-term preservation.
Summary: A Diagnostic Framework for Canvas Preservation
- Why keys and wedges are often not enough to fix a sagging 100-year-old canvas?
- How to mend a canvas tear thread-by-thread to keep the back invisible?
- Full Relining vs. Strip Lining: Which is less invasive for a brittle edge?
- The cleaning mistake that drives dirt deeper into the canvas weave
- When to stop hoping for humidity to fix a warp and intervene surgically?
- Why Even a 5% Humidity Fluctuation Can Ruin an Oil Painting in 48 Hours?
- The sizing mistake that causes oil paint to peel off the canvas after 10 years
- How to Display Art in a Sunny Living Room Without Fading the Pigments?
Why keys and wedges are often not enough to fix a sagging 100-year-old canvas?
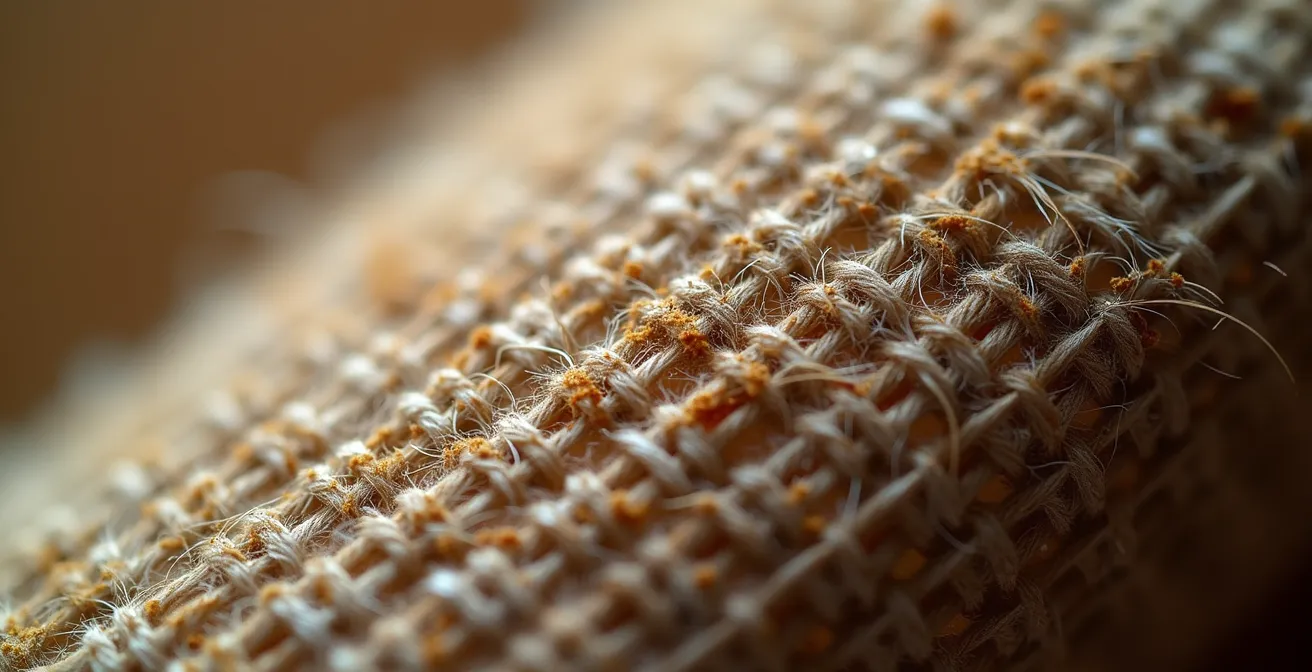
When a canvas begins to sag, the instinctive response is to reach for the stretcher keys and expand the corners to restore tension. While this provides a temporary cosmetic fix, it dangerously ignores the root cause of the slackness: the fundamental degradation of the canvas fibers themselves. An antique canvas is not merely stretched; it is a material that has undergone significant chemical and physical changes. Relying solely on keys is a critical error because it applies new, often uneven, stress to a structure that is already fundamentally weak.
The core problem is the loss of structural integrity. Over a century, the cellulose fibers in linen or cotton canvas break down, becoming brittle and losing their ability to bear a load. In fact, research shows that canvas paintings can show a 25-30% reduction in tensile strength after 100 years. Expanding the stretcher violently pulls on this weakened fabric, which can accelerate the formation of cracks in the now-brittle ground and paint layers. The canvas may appear taut, but you have merely masked the symptom while worsening the disease.
True diagnosis requires assessing the fabric’s condition. Is it brittle to the touch? Does it feel papery and weak? If so, adding tension is the last thing it needs. The sagging is a signal that the support system is failing and requires structural reinforcement, not simply more tension. Ignoring this signal in favor of a quick fix with keys is a direct path to corner cracks and, eventually, catastrophic tears. The problem is no longer about tension; it’s about the material’s inability to handle it.
How to mend a canvas tear thread-by-thread to keep the back invisible?
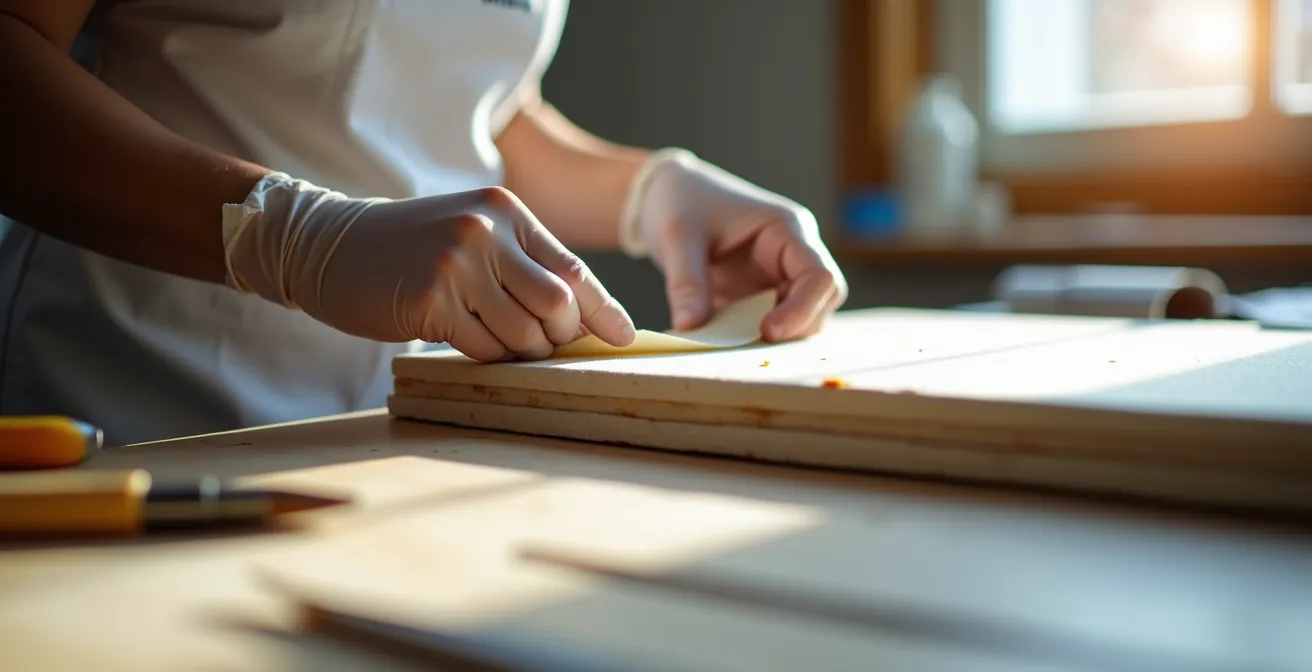
A tear in a canvas is a traumatic structural failure, and patching it from behind, while common in amateur repairs, is an invasive procedure that creates a visible bulge and introduces new materials that age differently. The professional conservation standard is far more meticulous, aiming for a repair that is mechanically sound and aesthetically invisible. This is achieved through a painstaking process known as thread-by-thread tear mending, a surgical intervention that re-establishes the canvas’s original weave.
The process is performed under high magnification. The conservator first carefully aligns the broken threads on either side of the tear. If threads are lost, matching threads are sourced, often from the excess canvas on the tacking edge, to ensure perfect compatibility in fiber type, thickness, and age. Each individual thread is then painstakingly rewoven into the existing structure, bridging the gap and restoring the continuity of the fabric. The fibers are secured with a stable, reversible conservation adhesive that will not discolor or become brittle over time.
The choice of adhesive is critical to the repair’s longevity and reversibility, a core principle of modern conservation. As noted by conservation specialists, materials are chosen for their stability and removability. A prime example is explained by the Heritage Preservation Atelier:
Beva 371: A synthetic thermoplastic adhesive (a mixture of ethylene-vinyl acetate resin, paraffin, and microcrystalline wax) commonly used in painting conservation. BEVA 371 is used for lining canvases, consolidating flaking paint, and other treatments because it is stable, reversible with heat or solvents, and has a long working time.
– Heritage Preservation Atelier, Understanding Painting Conservation Terms
This technique is the ultimate expression of minimal intervention. It adds no bulky patch, creates no new tension points, and respects the original material. While incredibly time-consuming, it is the only method that truly repairs the damage rather than covering it up, leaving the back of the canvas pristine and the front of the painting structurally sound.
Full Relining vs. Strip Lining: Which is less invasive for a brittle edge?
When the edges of a canvas become brittle, frayed, or torn from the stretcher, a structural intervention is unavoidable. For decades, the standard response was “full relining,” a highly invasive process where a new canvas is adhered to the entire back of the original painting. While this provides robust support, it fundamentally alters the artwork, adding significant weight, potentially flattening impasto, and being extremely difficult to reverse. For a painting suffering primarily from edge weakness, full relining is often an excessive and damaging solution.
A more modern, targeted, and less invasive approach is strip lining. This technique involves reinforcing only the weak or damaged tacking edges. A narrow strip of new, stable fabric (often linen or a synthetic polyester sailcloth) is adhered to the perimeter of the original canvas. This provides the necessary strength to re-stretch the painting securely without affecting the central image area. The original character, texture, and weight of the painting are largely preserved, and the intervention remains fully reversible.
The decision between these two methods comes down to a careful diagnosis of the painting’s needs. Strip lining is the preferred method when the canvas is generally sound but has failed at the edges. Full relining is reserved for cases of severe overall deterioration, such as extreme brittleness, multiple large tears, or a complete loss of structural integrity across the entire canvas. As this comparative analysis from conservation literature highlights, the choice has significant implications.
| Aspect | Full Relining | Strip Lining |
|---|---|---|
| Invasiveness | High – entire canvas backed | Low – edges only reinforced |
| Weight Added | Significant increase | Minimal increase |
| Original Stretcher | Often replaced | Can be retained |
| Reversibility | Difficult to reverse | More easily reversible |
| Use Case | Severe overall deterioration | Edge weakness primarily |
Choosing strip lining over full relining whenever possible adheres to the core conservation ethic of minimal intervention. It solves the immediate structural problem without compromising the artwork’s long-term integrity or originality.
The cleaning mistake that drives dirt deeper into the canvas weave
Over decades, a painting’s surface accumulates a disfiguring layer of grime, a mixture of dust, soot, and pollutants that dulls the colors and obscures the artist’s intent. The temptation to clean the surface with a damp cloth is strong, but it is one of the most damaging mistakes a non-professional can make. This seemingly harmless act can cause irreversible harm by driving dirt particles deeper into the microscopic texture of the paint and canvas weave, making them nearly impossible to remove later. Even worse, it introduces a dangerous element: moisture.
The structure of a painting is a delicate, multi-layered system, and the canvas and size layers are often highly hygroscopic (water-absorbent). As professional conservation experts warn, moisture can soften or even dissolve the size layer, which is the critical barrier separating the oil paint from the raw canvas fibers. Once this barrier is compromised, the paint is at risk of delaminating. Furthermore, if the canvas becomes saturated, its fibers can swell and then shrink as they dry, causing the entire painting to warp and putting immense stress on the brittle paint layer.
Professional surface cleaning is a meticulous, dry process. Conservators use specialized, soft brushes and specific types of vulcanized rubber sponges (like “smoke sponges”) that gently lift and hold surface grime without abrading the paint or introducing moisture. For more stubborn grime, they may use precisely formulated aqueous gels or solvent mixtures, but these are applied with extreme control, often with tiny swabs under a microscope, to ensure they act only on the dirt layer and do not penetrate the varnish or paint. The goal is always to remove what is foreign without disturbing what is original.
When to stop hoping for humidity to fix a warp and intervene surgically?
A canvas can develop planar distortions—bulges, dents, or corner warps—due to improper storage, impact, or fluctuations in humidity. A common belief is that simply moving the painting to a more humid environment will allow the canvas to relax and flatten on its own. While controlled humidity treatments are a valid conservation technique, passively “hoping” for a fix is a gamble that can backfire. There is a critical point at which the deformation becomes permanent, and waiting too long risks making the problem worse or introducing a new threat: mold.
Professional conservators may use controlled applications of moisture and gentle pressure to relax canvas deformations. However, this is done within a strict diagnostic framework. The first step is to assess the nature of the warp. Is it a soft, gentle bulge, or a hard, creased distortion? Hard creases indicate that the canvas and paint layers have been physically altered and are unlikely to relax with humidity alone. A key professional benchmark is time: if a deformation does not respond after a controlled period of humidification, a more direct, “surgical” intervention is required.
The decision to intervene is guided by clear criteria. Before attempting any humidity treatment, the risk of mold growth must be assessed, as a damp environment can quickly trigger an outbreak on the organic materials of the canvas and sizing. If the warp is persistent, conservators will move to mechanical treatments. This can involve removing the canvas from the stretcher, treating the deformed area locally with controlled moisture and weights, and then re-stretching it. In severe cases, a partial lining may be necessary to stabilize the deformed area. The key is to act decisively once it becomes clear that passive methods are failing.
Why Even a 5% Humidity Fluctuation Can Ruin an Oil Painting in 48 Hours?
The single greatest threat to the long-term stability of a canvas painting is not light or physical damage, but something invisible: fluctuations in relative humidity (RH). A canvas, along with its wooden stretcher and the animal glue sizing, is a hygroscopic material. This means it actively absorbs and releases moisture from the air, causing it to expand in damp conditions and contract in dry ones. This constant movement, however small, places immense and repetitive mechanical stress on the overlying paint layer, which is typically much more brittle and less flexible.
While a stable RH of 45-55% is ideal, the real danger lies in the speed and magnitude of changes. Each cycle of expansion and contraction forces the paint layer to flex. Over time, this “fatigue” leads to a network of fine cracks, known as craquelure. As the process continues, the edges of these tiny cracked “islands” of paint can begin to lift, a condition called cupping. Eventually, the bond with the ground layer fails completely, and the paint flakes off. A rapid, significant swing in humidity can trigger this process with alarming speed.
The thresholds for damage are surprisingly low. While many assume only dramatic environmental changes are a concern, museum conservation standards indicate that a daily variation in relative humidity of just 5% is the maximum considered safe. A swing of 10% or more significantly increases the risk to organic materials. In a home without climate control, a rainy day followed by a dry, heated one can easily cause a 20-30% RH swing, subjecting a painting to a violent cycle of expansion and contraction that can cause visible damage within days.
The sizing mistake that causes oil paint to peel off the canvas after 10 years
For centuries, the standard preparation for an oil painting canvas involved applying a layer of animal glue, typically rabbit skin glue (RSG), as a size. The purpose of this sizing is to seal the porous canvas fibers, preventing the acidic linseed oil in the paint from rotting the fabric. While effective at this task, RSG is also a hidden time bomb. It is an extremely hygroscopic material—far more so than the canvas or oil paint—and this property is the source of a devastating, delayed-action failure mode.
Because RSG is so sensitive to moisture, it responds dramatically to any change in relative humidity. It swells powerfully in damp air and shrinks with incredible force as it dries. This constant, aggressive movement creates a shear stress at the interface between the flexible sizing and the more rigid oil ground or paint layers. For years, the paint may seem perfectly stable. But with each seasonal cycle, the glue layer is pulling and pushing on the back of the paint film, progressively weakening its adhesion.
Eventually, the bond fails. This often manifests as large-scale delamination, where entire sections of the paint and ground layers peel away from the canvas, a condition known as flaking or cleaving. This is not a failure of the paint itself, but a failure of the foundation it was built upon. Research on traditional materials confirms the volatile nature of this sizing, noting that the significant shrinkage of rabbit skin glue is a primary driver of stress in paint layers. Modern conservation often uses more stable synthetic sizes, like PVA or acrylic dispersions, to avoid this built-in flaw, but for any historical painting, the presence of RSG must be assumed and treated as a major inherent risk factor.
Key Takeaways
- A century-old canvas has lost up to 30% of its tensile strength; keys alone cannot fix this fundamental weakness.
- Minor humidity shifts (as low as 5%) cause the hygroscopic canvas and sizing to expand and contract, creating micro-cracks that lead to paint loss.
- Professional conservation prioritizes minimal intervention and reversibility, favoring strip lining over full relining and dry cleaning methods over wet ones.
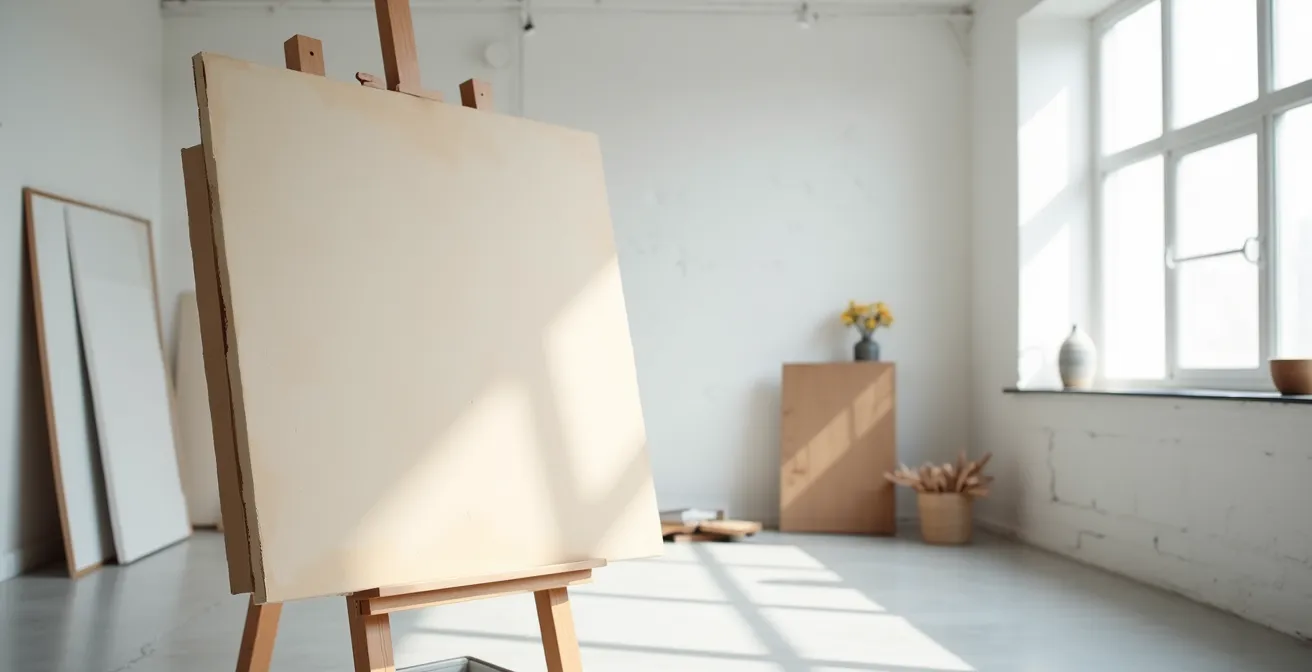
How to Display Art in a Sunny Living Room Without Fading the Pigments?
Light is essential for viewing art, but it is also a primary agent of its destruction. The energy in light, particularly in the ultraviolet (UV) and visible spectrum, triggers chemical reactions in pigments that cause them to fade and change color. This damage is cumulative and irreversible. A sunny living room, with its high levels of direct and indirect light, is one of the most hazardous environments for a painting. Protecting artwork in such a space requires a multi-pronged strategy focused on reducing total light exposure and filtering out the most damaging wavelengths.
The first principle is to minimize direct exposure. Never hang a valuable painting where direct sunlight will fall on it at any time of day. The intensity of direct sun is exponentially more damaging than ambient room light. Museum conservation standards recommend limiting light to about 150 lux for oil paintings. By comparison, indirect daylight near a window can be several thousand lux, and direct sunlight can exceed 50,000 lux. The goal is to keep light levels as low as possible consistent with good viewing.
Since eliminating light entirely is not an option, the next step is to filter it. The most effective single action is to frame the artwork with UV-filtering glazing (glass or acrylic). High-quality glazing can block over 99% of damaging UV radiation. However, visible light also causes fading, so further measures are necessary. Implementing a comprehensive light management plan is not optional; it is a critical part of owning and caring for art.
Action Plan for Safe Artwork Display
- Hang artworks on interior walls and keep them away from heaters, humidifiers, ventilation systems, and direct sunlight.
- Use UV-filtering glass or acrylic glazing on all framed works to block the most damaging radiation.
- For especially sensitive works, implement a light rotation schedule, displaying them for limited periods before returning them to dark storage.
- Install light-filtering curtains, shades, or window films to reduce the intensity of light entering the room, especially during peak sun hours (10am-4pm).
- Monitor the total annual light exposure (measured in lux-hours) for highly valuable pieces to stay within conservation-approved limits.
By layering these strategies, you can create a safer environment that balances the desire to enjoy your art with the urgent need to preserve it for the future. The damage from light is slow and silent, but its effects are permanent.
Begin applying this diagnostic framework to your collection today. By shifting your focus from surface symptoms to structural health and environmental threats, you can move from reactive repairs to proactive preservation and secure the legacy of your artworks.