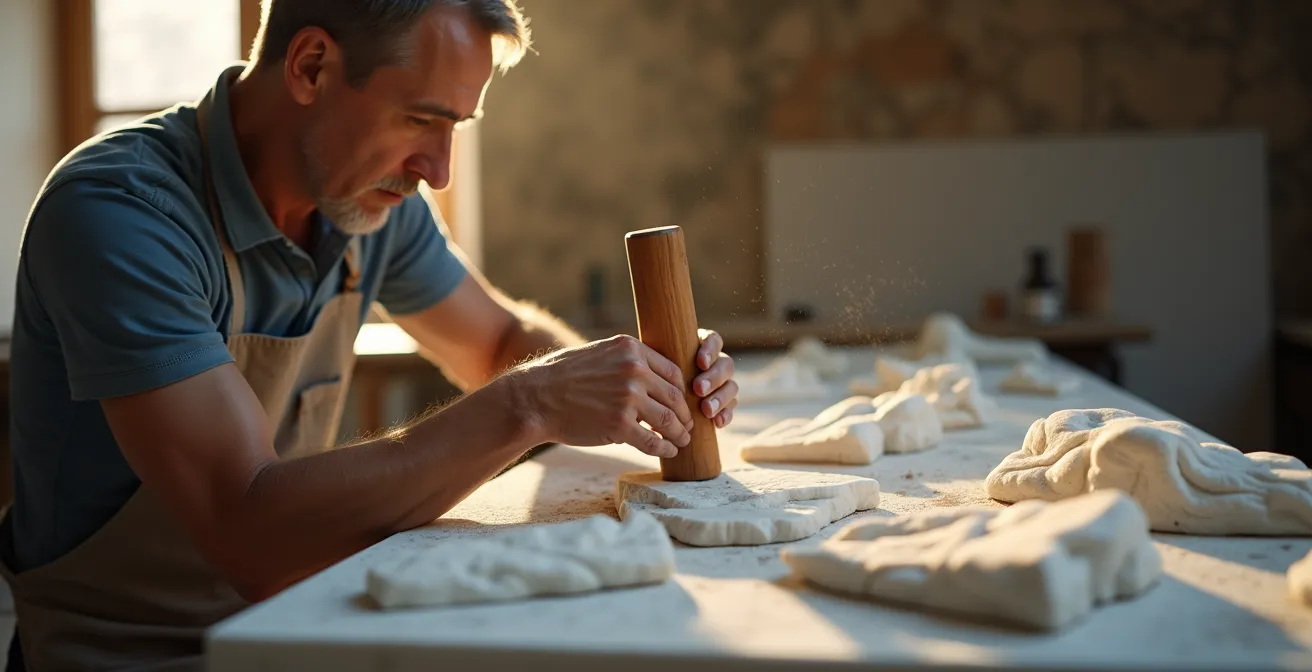
The secret to carving deep, unbroken marble folds lies not in cautious hesitation, but in scientifically managing material stress.
- Recognize early signs of material fatigue—like changes in sound and dust—to stop cracks before they start.
- Understand that the angle and type of tool strike directly control force propagation through the stone’s crystalline structure.
Recommendation: Shift your mindset from fearing breakage to actively controlling stress. Treat each tool strike as a calculated step in directing energy, not just removing material.
The moment every stone carver dreads: the sickening *snap* of a delicate fold breaking off after hours of painstaking work. For those attempting complex drapery for the first time, this fear can be paralyzing. The common advice—”be patient,” “go slow”—is true but incomplete. It treats marble as a mysterious adversary, when in reality, it is a material governed by predictable physical laws. The fragility of a deep fold is a question of physics, not just artistry. Prevention is always superior to the near-impossibility of a seamless repair, which often leaves visible lines and compromises the integrity of the piece.
This guide reframes the challenge. Instead of simply advising caution, we will delve into the science of stress management within the stone. The true key to carving dramatic, deep folds without catastrophic failure is not about having a lighter touch, but about having a deeper understanding. It’s about learning to read the material’s fatigue signals, understanding how force propagates through a crystalline structure, and making informed decisions about tool selection and striking angles at every stage. We will move beyond the platitudes and into the practical mechanics of controlled fracture.
By mastering these principles, you can transform your fear into focused confidence. You will learn to work with the stone’s inherent properties, directing its response to your tools and creating the fluid, dramatic drapery you envision. This is where disciplined technique meets material science to create enduring art.
This article provides a structured approach to mastering this skill. We will explore the critical stages of the process, from initial material assessment and tool choice to the final, delicate moments of finishing that make or break the piece.
Summary: A Disciplined Approach to Carving Marble Drapery
- Why using a toothed chisel too late in the process leaves bruises in the marble?
- How to sand marble to a high gloss without flattening the crisp details?
- Pneumatic Hammer vs. Wooden Mallet: Which gives you more “feeling” for the stone?
- The striking error that creates internal micro-cracks invisible until polishing
- How to remove 50% of the block waste in one day safely?
- How to sound-test a block of marble to find hidden internal cracks?
- Cross-hatching vs. Smudging: Which creates more volume in architectural drawing?
- How to Clean Lichen Off a Limestone Statue Without Eating Away the Surface?
Why using a toothed chisel too late in the process leaves bruises in the marble?
The phenomenon known as “bruising” or “stunning” in marble is not a surface-level imperfection; it is the visible evidence of internal structural damage. Using an aggressive tool like a toothed chisel on a form that is already near its final shape is a critical error. In the early stages, the bulk of the marble block can absorb and dissipate the energy of a heavy strike. However, as the form becomes more refined and thinner, there is less mass to absorb this impact. Instead of shearing off cleanly, the force from the chisel pulverizes the calcite crystals directly under the point of impact.
This isn’t just theory; it’s a matter of material science. Recent lab experiments on Carrara marble show that deformation occurs through a sequence of mechanisms. At the beginning of the carving process, the stone withstands significant cracking and crystal reorganization. However, the study confirms that the overall strength is most likely controlled by the motion of crystal defects, which is a much harder deformation mechanism to activate. When you use a toothed chisel late in the game, you’re applying high-impact force to a structure that has lost its ability to deform gracefully. This causes irreversible crystal damage that appears as a milky, opaque bruise, which no amount of polishing can remove because the damage is deep within the stone’s structure.
A disciplined carver learns to recognize the transition points. There are clear signals that the stone is no longer able to accept aggressive tooling:
- Sound Change: The clear, ringing sound of a productive strike gives way to a dull, low ‘thud’, indicating that the energy is crushing crystals rather than shearing them.
- Tool Resistance: The chisel begins to ‘stall’ or ‘bounce’ instead of biting into the stone. This means the form is too delicate to counteract the force of the blow.
- Dust Transformation: The dust changes from small, granular chips to a fine, chalky powder. This powder is the most telling sign of pulverization.
Leaving small ‘bridges’ or supports of material connecting delicate folds until the very end is a crucial strategy. These bridges help to dissipate the shock and prevent it from concentrating on a fragile, unsupported section.
How to sand marble to a high gloss without flattening the crisp details?
Achieving a high-gloss, “wet-look” finish on marble while preserving the sharp arrises and delicate textures of drapery is the final test of a carver’s discipline. The common mistake is to treat polishing as a brute-force activity, using heavy pressure and coarse grits that round over every crisp edge. The secret lies in a gradual, patient process of abrasion, where each successive step refines the surface rather than reshaping it. The goal is to let the tool do the work, not your muscles.
Modern techniques rely on flexible, water-fed diamond polishing pads. As outlined in professional restoration guides, diamond polishing pads work through a gradual abrasion process, where each finer grit pad removes the scratches left by the previous one. The key to preserving detail is using minimal pressure and keeping the pad moving, allowing the diamond-impregnated surface to gently plane the stone. Pressing too hard will not only flatten details but can also generate heat, which can cause micro-fractures in the delicate crystalline structure.

As the illustration demonstrates, the process is one of micro-abrasion. For the sharpest interior corners and arrises, where a circular pad cannot reach, other tools are essential. The choice of method depends on the specific challenge of the form.
| Method | Material | Grit Range | Best Application | Detail Preservation |
|---|---|---|---|---|
| Diamond Pads (Wet) | Diamond-embedded resin | 50-3000+ | Progressive refinement | Excellent – controlled removal |
| Tin Oxide | Stannic oxide powder | Ultra-fine (8000+) | Final polish on edges | Superior – chemical reaction |
| Felt Bobs | Hard felt with compound | Variable | Sharp arrises & corners | Excellent – localized application |
| Traditional Pumice | Volcanic stone powder | 1000-2000 | Historical technique | Good – gentle abrasion |
The final, mirror-like polish is often achieved with tin oxide. This ultra-fine powder is mixed into a paste and applied with a felt or leather buff. Unlike abrasive pads, tin oxide works partly through a chemical reaction, producing an exceptionally deep gloss without removing any significant amount of material, making it ideal for the final touch on the most delicate details.
Pneumatic Hammer vs. Wooden Mallet: Which gives you more “feeling” for the stone?
The debate between traditionalists and modernists in sculpture often centers on this question. The wooden mallet and chisel offer a direct, intimate connection; the sculptor feels the shock of impact and the stone’s resistance travel directly up their arm. The pneumatic hammer, with its rapid, lighter blows, seems disconnected by comparison. However, the concept of “feeling” the stone can be understood not just as a romantic notion, but as a tangible, physical phenomenon related to frequency and feedback.
A wooden mallet delivers a low-frequency, high-impact blow. This is excellent for removing mass but can be too powerful for delicate areas, transmitting a shockwave that can cause unseen fractures. A pneumatic hammer delivers a high-frequency, low-impact series of blows. This allows for more controlled, continuous removal of material and is often safer for delicate work. The “feeling” is different—it’s less about the singular percussive shock and more about observing the rate of material removal and listening to the high-pitched hum of the tool.
The stone itself communicates its state through sound. Scientific analysis provides a concrete basis for this sculptor’s intuition. Research from the National Academy of Sciences demonstrates that acoustic emissions during marble carving show systematic frequency increases as the stone is stressed. An experienced ear, whether using a mallet or a pneumatic tool, is trained to detect these subtle shifts in pitch. A change in sound is a direct signal of a change in the stone’s internal structure—perhaps an approaching vein, a hidden fissure, or an area of increased tension.
Ultimately, the choice of tool is less important than the carver’s ability to interpret the feedback. Even historical masters sought ways to apply controlled, high-frequency force for delicate work. Master sculptor Jyl Bonaguro notes that for areas like curly hair or deep folds, Michelangelo used 2 person drills for depth… a chisel would break the marble and a rasp would take forever
. This historical use of a drill, a rotary tool, was a way to achieve high-frequency material removal in a controlled manner, long before pneumatic hammers existed. Therefore, “feeling” is not exclusive to one tool but is about the sculptor’s developed sensitivity to the stone’s acoustic and physical responses, regardless of the instrument used.
The striking error that creates internal micro-cracks invisible until polishing
The most dangerous fractures are not the ones that happen with a loud crack, but the ones that develop silently within the stone. These are the insidious micro-cracks, often initiated by a single, seemingly harmless striking error, that only reveal themselves during the final stages of polishing as a web of fine, infuriating lines. The error is not about striking too hard, but about striking at the wrong angle. Every blow from a hammer and chisel sends a cone of force propagating into the stone. The goal is to direct this force to shear off a chip. A striking angle that is too oblique—too close to parallel with the surface—does not create a clean shear.
Instead of lifting a chip, an oblique strike sends a shockwave horizontally *into* the surface, compressing and then releasing the calcite crystals. This action, repeated over time, initiates a network of micro-cracks just below the surface. These cracks are often invisible to the naked eye, held closed by the surrounding material. However, as subsequent layers are removed through sanding and polishing, these hidden faults are revealed. This is especially true for deep folds, where a carver might be tempted to “shave” the surface with an angled chisel rather than striking more perpendicularly.

This isn’t just anecdotal; it is backed by quantitative analysis of stone mechanics. The pressure under which a stone is held dramatically affects how it fractures. Scientific analysis published in Nature reveals that the crack density in Carrara marble increases significantly under lower confining pressures. In practical terms, this means a thin, unsupported fold of drapery (low confining pressure) is exponentially more susceptible to cracking from an incorrect strike than a massive block. An oblique strike on a thin section is the perfect recipe for creating a high density of these invisible micro-cracks.
The disciplined approach is to always, as much as possible, strike with the chisel held at an angle that promotes shearing, typically between 60 and 80 degrees to the surface. For shaping curves, this means constantly adjusting the position of your body and the stone, rather than lazily angling the chisel. It requires more effort and patience, but it is the fundamental insurance policy against the heartbreaking discovery of hidden cracks during the final polish.
How to remove 50% of the block waste in one day safely?
The initial stage of carving, known as roughing out, is a balancing act between speed and safety. The goal is to remove the maximum amount of waste material to reveal the basic form—the “big shapes”—without compromising the integrity of the stone that will remain. The idea of removing 50% of a block in a single day may seem reckless, but in professional quarrying and sculpting studios, it is a systematic process rooted in understanding the stone’s lines of force. The key is not to “attack” the stone, but to persuade it to break where you want it to.
This is achieved by thinking like a painter making a preliminary sketch. As described in professional guides, the sculptor chips away larger, unnecessary chunks, cautiously ensuring they don’t take away too much
. This is done not with delicate taps, but with a heavy mason’s hammer and a point chisel. The process involves creating a series of deep points or a channel along the intended line of fracture. By creating this line of weakness, the sculptor is telling the stone where to direct the energy of the subsequent, more powerful blows. A few well-placed, heavy strikes along this prepared line will often cause a large chunk to split off cleanly, following the path of least resistance you have created.
The safety of this method relies on two principles. First, a thorough understanding of the block’s natural state, including its veining and any potential hidden faults (which we will cover next). A sculptor never attempts a major split across a known fissure. Second, a commitment to the plan. This is not random hacking; it is a deliberate, staged removal of material. The process is akin to a controlled demolition. You are not just hitting the stone; you are strategically placing charges to guide the collapse.
This aggressive but calculated approach is what separates amateurs from professionals. An amateur nibbles away at the block, taking weeks to do what a professional, with a clear three-dimensional vision and confidence in their technique, can achieve in a day. It is a testament to the fact that in stone carving, a few powerful, intelligent strikes are often safer and more effective than a thousand timid ones.
How to sound-test a block of marble to find hidden internal cracks?
Before a single creative mark is made, the most critical step is to understand the raw material. A block of marble that appears perfect on the outside can harbor internal fissures, voids, or “dry” seams that will doom a delicate project from the start. The most reliable, non-destructive method for assessing a block’s integrity is the sound test. This technique, which transforms the abstract advice to “listen to the stone” into a practical diagnostic procedure, relies on the way sound waves travel through a solid medium.
A solid, homogenous block will ring with a clear, sustained tone when struck. An internal crack, void, or change in density will interrupt the sound wave, resulting in a dull, flat ‘thud’ or a rattling buzz. It is a low-tech method that requires a highly-attuned ear and a systematic approach. Tapping randomly is insufficient; a professional protocol is needed to map the entire block and identify suspicious areas. Research into the strength and damage of marble confirms that changes in its internal structure directly impact its physical properties, which can be detected acoustically.
A thorough assessment involves moving beyond a simple tap test and adopting a more scientific methodology to ensure no flaw goes undetected. This protocol ensures you are building your sculpture on a solid foundation, free from catastrophic hidden variables.
Action Plan: Professional Sound Testing Protocol
- Dry Tap Method: Use a consistent force with a 600g (approx. 1.3 lbs) steel hammer. Systematically tap the entire surface, listening not just for the tone but for the sustain. A healthy stone rings; a flawed stone dies.
- Wet Surface Amplification: Thoroughly wet the entire surface of the block with water. Tap again, this time watching the surface of the water. A hidden crack close to the surface will cause the water directly above it to vibrate or ‘dance’ differently from the surrounding area.
- Grid Mapping: Draw a chalk grid (e.g., 10×10 cm squares) over all faces of the block. Tap the center of each square with identical force and listen for variations between adjacent squares. Mark any square that sounds dull or different.
- Frequency Analysis: For a high-tech approach, use a smartphone with a spectrogram app. Record the tap in each grid square and look for sudden, sharp drops in the dominant frequency. This indicates a change in density that could be a flaw.
- Visual Correlation: Closely examine any areas identified as suspicious by sound. Look for hair-thin surface lines, changes in crystal texture, or lines that run contrary to the main veining, as these can be the surface expression of an internal flaw.
Cross-hatching vs. Smudging: Which creates more volume in architectural drawing?
While this question seems to belong to the 2D world of drawing, it is fundamentally linked to the 3D reality of carving. For a sculptor, a preparatory drawing is not a picture; it is a blueprint. It is a two-dimensional map that must convey three-dimensional information about form, structure, and depth. In this context, the choice between techniques like cross-hatching and smudging is not aesthetic, but informational. Smudging, which creates soft, tonal gradients, is excellent for conveying mood and surface texture. However, it provides zero structural information. It tells the carver *what* the surface looks like, but not *where* it is in space.
Cross-hatching, on the other hand, is a language of structure. As art historians analyzing Renaissance drawings have noted, the directional lines of hatching and cross-hatching in a sculptor’s drawing are not arbitrary. They directly translate to the intended direction and depth of chisel strokes. A dense patch of cross-hatching in a drawing indicates a deep recession that will require significant material removal. The angle of the hatching lines can suggest the plane of a form as it turns away from the viewer. It creates volume by defining planes and their relationship to one another.
This direct translation from 2D line to 3D action is the core of the technique. The drawing becomes a strategic plan for material removal, turning the carving process into an execution of a pre-visualized strategy rather than a series of improvisations.
| Drawing Technique | Information Conveyed | Carving Translation | Best Use Case |
|---|---|---|---|
| Cross-hatching | Planar structure & depth | Chisel stroke direction | Complex drapery folds |
| Curved hatching | Tension & flow direction | Stress point mapping | Fabric over forms |
| Dense hatching | Deep recession areas | Material removal depth | Shadow planning |
| Smudging | Surface tone only | No structural data | Mood studies only |
Therefore, for the purposes of creating volume in a drawing that will be used for sculpture, cross-hatching is unequivocally superior. It is a precise, structural language. Smudging is a descriptive afterthought. A disciplined carver draws with lines that think in three dimensions, creating a map that will guide the chisel through every complex fold and deep shadow.
Key Takeaways
- Preventing breakage is not about being timid; it’s about understanding and managing the physical stress within the stone.
- The stone provides clear signals of fatigue—changes in sound, tool feel, and dust—that a disciplined carver must learn to read.
- Every action, from the angle of a chisel strike to the choice of a polishing pad, is a scientific decision that affects the stone’s structural integrity.
How to Clean Lichen Off a Limestone Statue Without Eating Away the Surface?
While the focus of this guide is on the creation of form in marble, the sculptor’s responsibility extends to the long-term preservation of their work. A statue’s interaction with the environment begins the moment it is finished, and choices made during carving can have consequences decades later. This is particularly evident when considering the cleaning of biological growth like lichen from limestone or marble. The wrong cleaning method can cause more damage in an hour than a century of weathering.
The cardinal rule is to avoid all acid-based cleaners. Lichen secretes a mild acid that allows it to etch into the surface, but using an aggressive acid cleaner to remove it is a catastrophic error. Both limestone and marble are composed of calcium carbonate, which dissolves rapidly in acid. Using such cleaners will not only remove the lichen but also a layer of the original sculpted surface, permanently erasing fine details. A disciplined preservationist or owner must adopt a hierarchical approach, always starting with the least invasive method possible.
The hierarchy of non-destructive cleaning is as follows:
- Mechanical Cleaning: The first step is always gentle mechanical removal using soft, natural bristle brushes and distilled water. Working in gentle, circular motions helps lift the surface growth without creating directional scratches in the stone.
- Mild Chemical Cleaning: If mechanical cleaning is insufficient, a pH-neutral, non-ionic detergent can be used. The solution should be applied with soft sponges and never be allowed to dry on the surface, followed by a thorough rinse with distilled water.
- Poultice Method: For stubborn, ingrained stains, a poultice (e.g., clay mixed with an agent like ammonium carbonate) can be applied. The poultice holds the cleaning agent against the surface for a controlled duration, drawing the stain out of the stone’s pores.
- Biocide Application (Last Resort): In cases of heavy infestation, a carefully selected biocide can be used to kill the biological growth. This should be a last resort, applied sparingly, and followed by meticulous rinsing to remove all residue.
Interestingly, environmental weathering studies show how initial carving decisions directly influence this entire lifecycle. Deep, sharp folds that trap water and debris create ideal microclimates for lichen and moss to grow. Conversely, forms designed with subtle, water-shedding angles will naturally stay cleaner and require less invasive maintenance over their lifetime. Thus, the act of carving is also the first act of preservation.